
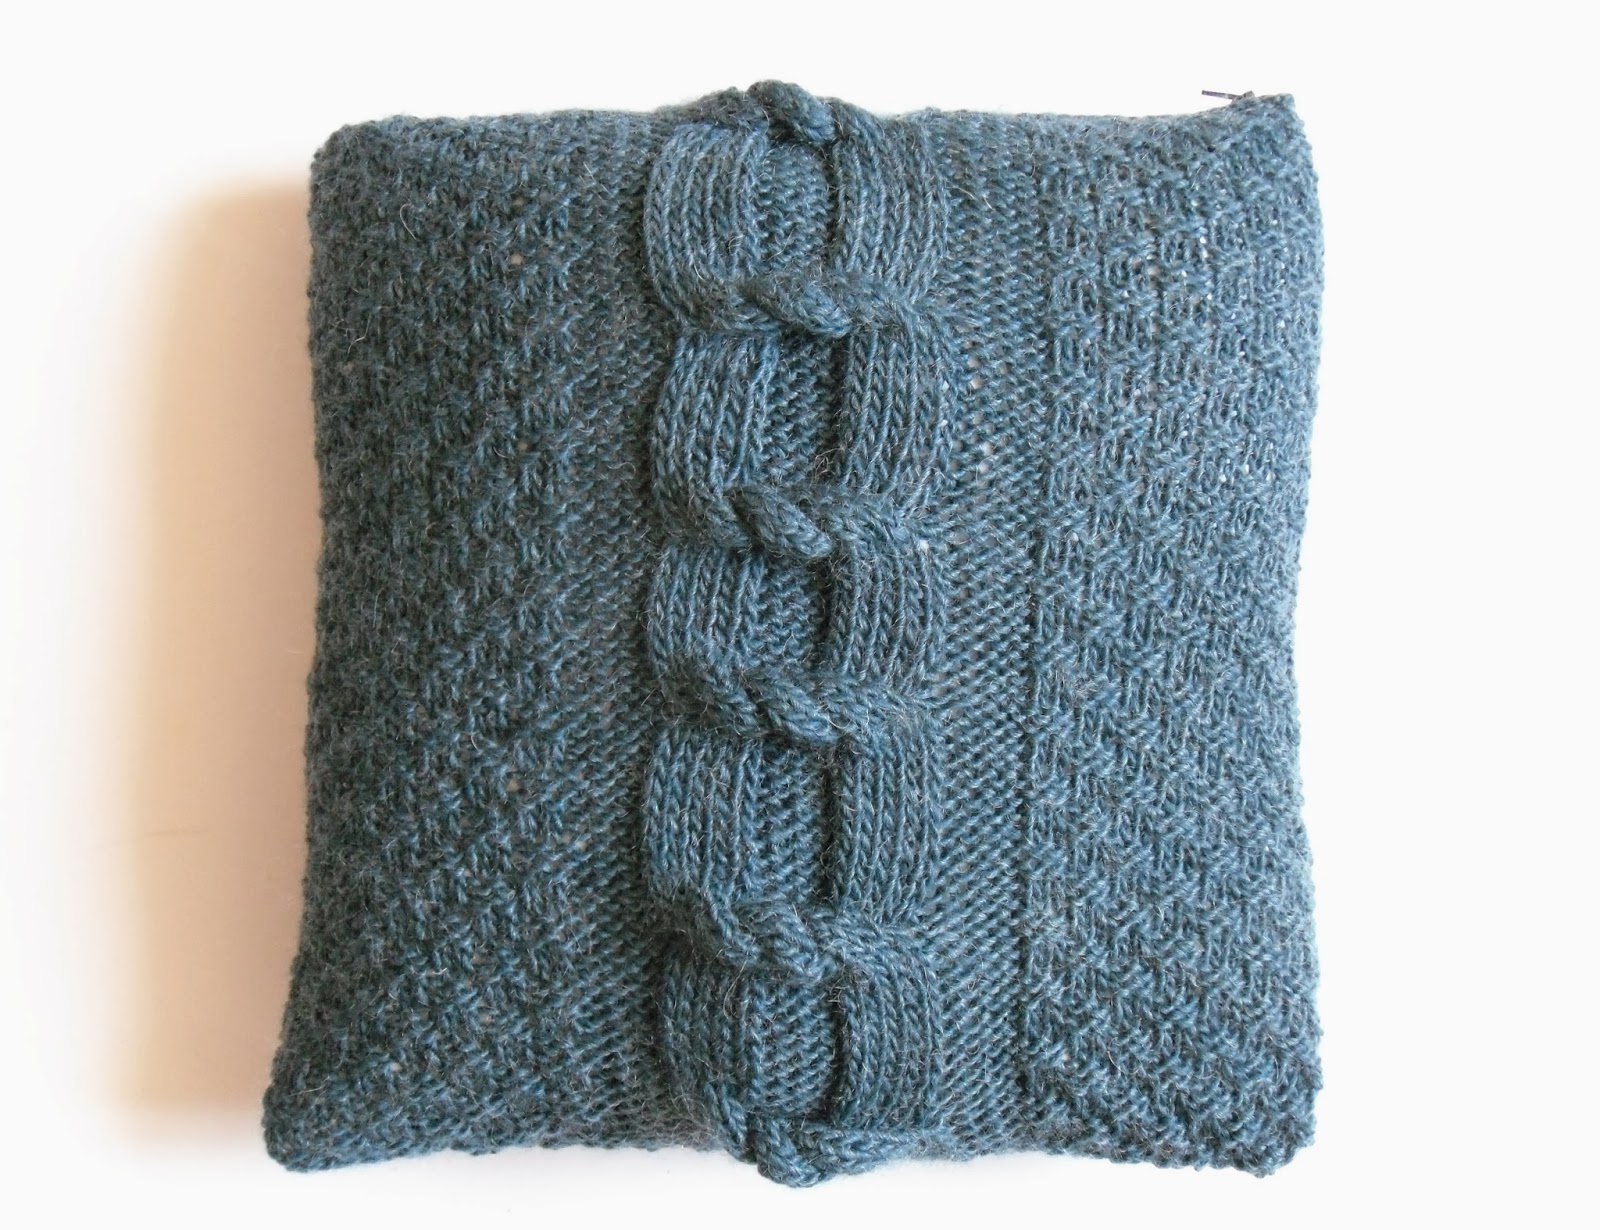
This cushion cover is knitted in 2 parts, with seams on 3 sides and then a zip fastening on the 4th side. It is assuming some knitting knowledge as the pattern for one of the sides will not explain the pattern row by row but will explain it in sections of knitting.
**** If you love the cushion but are unable to knit it , then why not purchase it from The Feminine Touch Designs here
The pattern has been inspired by a cable pattern I learnt at a Rowan Workshop back in 2012 called “Big Cables” held by Martin Storey.

A few days ago, the same "Big Cable" popped up on my facebook notifications. I knew I just had to knit the pattern again and share it with you too. I have used the same photo explaining the big cable in my pattern, as I found it so easy to follow.

What you will need
- 3 100G balls of Rowan cocoon yarn (80% wool, 20% mohair)
- 6.5mm (UK 3, US 10.5) needles
- Darning needle and a sewing needle
- Straight pins
- 14” zip that coordinates with the cushion
- Matching sewing cotton
Cast on 50 stitches
Row 1 Knit 2, Purl 2 ........till last 2 stitches then Knit 2
Row 2 Purl 2, Knit 2 ....... till last 2 stitches then Purl 2
Row 3 Purl 2, Knit 2 ........till last 2 stitches then Purl 2
Row 4 Knit 2, Purl 2 ........till last 2 stitches then Knit 2
These 4 rows set the pattern. Repeat these 4 rows 20 times more
Cast off
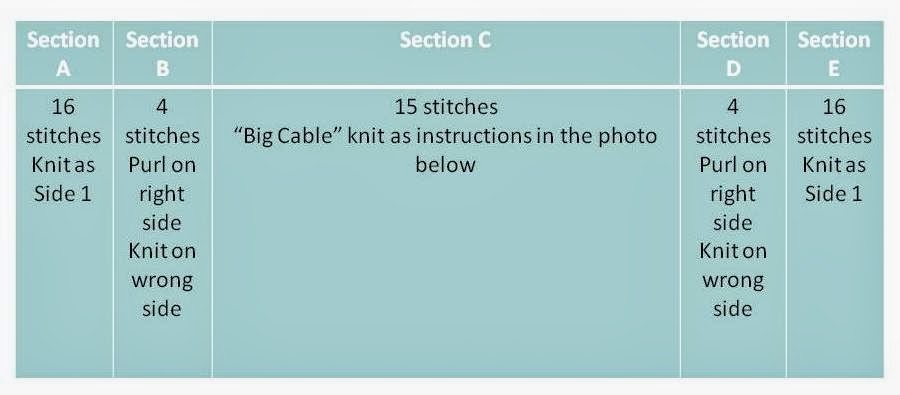
Stage 2 - Side 2 (Big Cable side)
Cast on 55 stitches
The pattern is broken down in to 5 sections (A – E)

PS - If you get stuck following the pattern from the photos , then please email me and I'll help you all I can. Or full instructions for the cable knot are included in my hot water bottle cover pattern .
Knit a total of 84 rows
Cast off
Stage 3 - Sew the zip in place
With the zip closed and the right side of the knitting facing up, pin one side of the zip to the cast off edge of side 1, so that the knitting covers as much of the fabric part of the zip as possible.
Using matching thread, sew the zip to the project from the front, placing your stitches as close to the zip mechanism as you can, and taking care to make your stitches as invisible as possible.
Pin the second side of the zip to the cast off edge of side 2 in the same manner, unzipping the zip if necessary.
Sew this side from the front in the same way as before.
Turn the cushion to the wrong side and sew the zip flaps to each side, again trying to make your stitches invisible.
Stage 4 – Finishing off
Make sure you have the right sides facing you
Use one of the tail ends at either the cast on or cast off row and thread the darning needle with it
Use mattress stitch to join the sides.
Please feel to make as many of these as you like for personal use, but I would ask that you don't sell the finished items. Please do not reproduce any or all of the tutorial, without linking back to here.
Did you know ! Cables for the home are TRENDING NOW!
Heh ! If you like this free pattern and want to know as soon as I write another , then why not like my Facebook Page!


That is just gorgeous. I have a very long way to go before I can do anything like that! I am still on scarves and mittens,
ReplyDeleteThis is a cable knitters dream! Must try!
ReplyDelete