Showing posts with label tutorial. Show all posts

Saturday, 28 February 2015

Feminine Lace Bolero to Knit Now

I knit this glamorous lace bolero up in a few hours once I had got used to the changes in thickness in the yarn . 

Its a super quick knit with a feminine finish. Great number to throw in to your suitcase for a holiday by the sun or to glam up your party frock. And why not knit in white or cream for a lovely wedding accessory.


Today I'm sharing the pattern for a medium size bolero. I'll include some tips at the end for making this in a smaller or larger version.

The yarn I used was : 1 x 100g ball of King Cole Opium (54% cotton , 42% acrylic).  There is approx 273 yards / 250 metres to each 100g ball.

I needed 3 sets of needles:
5.5mm straight needles
7mm straight needles
5.5mm circular needles


Instructions

With the 5.5mm needles cast on 35 stitches

Row 1 *K2, P2,* repeat from * to * to the end of the row ending with P1
Row 2  K1, *P2, K2 * repeat  from * to * to the end of the row

Change to 7mm needles  and work in this simple lace pattern until the work measures 20"

lace pattern:
K1, *YO, K2 tog* repeat from * to * to end of row

Change to 5.5mm needles and work 2 rows as follows

Row 1 *K2, P2,* repeat from * to * to the end of the row ending with P1
Row 2  K1, *P2, K2 * repeat  from * to * to the end of the row.

Bind off in the rib pattern.

OK , so you should now have a piece of work measuring approx 12.5" (wide)x 20" (long).  


folded in half
Fold the piece of work in half lengthwise (there is no right and wrong side to this piece of work) and sew together 1" at either end of long edges. 

This will make the armholes.


before the ribbed edging


Now for the ribbed edging.

Using the 5.5mm circular needle pick up and knit 128 stitches evenly around the circular long edge, being careful not to twist the stitches as you join the round. 

Work in rib K2 , P2 for 2". 

Bind off using the 7mm straight needle. 

Weave in all the ends.

So what do you do if you want smaller or larger versions of this? 

Well I would say:

Small - cast on 6 stitches less , so that's 29 stitches and only knit until the work is 17"

Large - cast on 6 stitches more , so that's 41 stitches and knit until the work is 23".

Hope you have fun knitting this lovely bolero. The main thing is that it can be knitted in any cotton dk yarn, is knit up super quick and only takes 100g! 


Wednesday, 18 February 2015

Course Review - Craftsy Pictures to Pixel Quilts

Pictures to Pixel Quilts
This post contains affiliate links - read more about affiliate programmes and sponsorship here

I have had this Craftsy course sat in my "Wishlist" for a couple of years. Why? you might be thinking would a knitter be interested in a quilting course?  

I had thought that this might find me a quick and cheerful way to produce fair Isle charts for my knitting. Just read my review to the end and you'll find out whether I think it will do the trick. 

Each of the Craftsy courses is broken in to a series of lessons , so you can learn at your own speed. I ended up doing this full course in 3 separate sittings , doing a quick review of the things I had learnt in the 1st lessons as I went along. 


Lesson 1 and 2 are the welcome and introduction.


Lesson 3 is great . At the end of the lesson you have enough information to choose the correct sort of picture to pixelate. I'm thinking that these pixelated picture would be suitable for Cross stitch work and Fair Isle work too , not just quilting.There is a lot of IT techie stuff covered;how to pixelate using the Mac and PC and what free software you could use. Even how to do it manually using an Ipad and graph paper!


Lesson 4 - This is where it starts getting quite technical and if you are not comfortable using Excel then either keep away from this course or take a lot of notes. But if you are determined that this is what you want to do then this process is great ! You get great instructions for sorting out columns and rows in your spreadsheet , creating legends for each of the colours and conditional formula to change the legend to the correct colour. As I said its a bit techie and probably only useful if you are used to excel even though she explains it very well.   

Working with excel and background image is even easier , I have used this method years ago.

Counting how many squares of each colour and counting what cuts and how many you need to make - great for quilt making!
Lesson 5 - calculating yardage - for quilters only


Lesson 6 - assembling the quilt

I didn't do Lesson 5 and 6 , sorry , but I'm sure the quality would have been good as the rest of the course was.

This was a very well instructed class. If this is what you fancy doing , its fiddly but the course covered EVERYTHING !
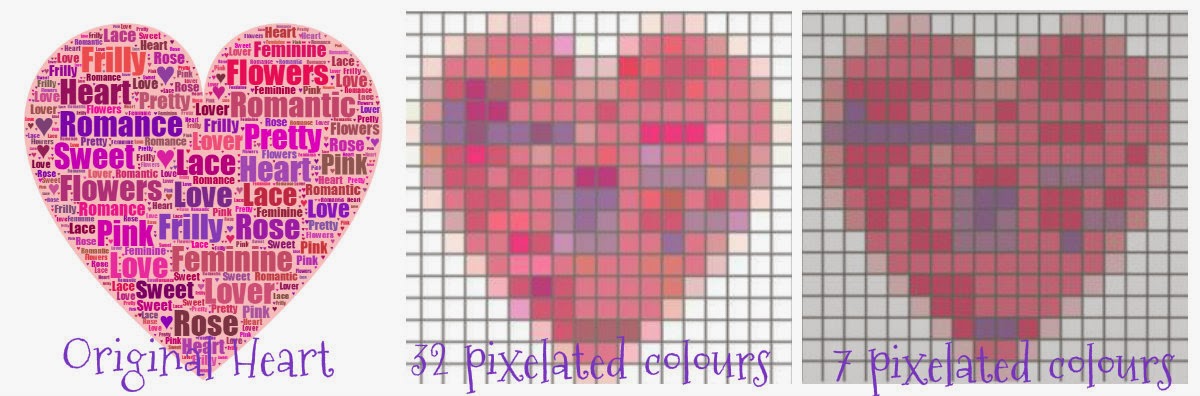
Straight away after doing the course I attempted to pixelate one of my pictures. I used the pic2pat software the instructor recommended and I turned my heart avatar to a series of pixelated pictures, which ranged from the use of 32 different colours to 7 colours. 


This has confirmed to me , that this software will produce the pixelated pictures that I need for Fair Isle work. Its just a matter of choosing the correct picture in the 1st place (as simple as possible). Once that's achieved then what I learnt in lesson 4 could be used to get the chart in Excel. 

Ooh ! the possibilities are endless.

And for you quilters, Craftsy (my fave on-line store at the moment) is giving away a great e-guide. That is FREE for you to download Now ! , only available for a limited time! Just click on the piccie below


Friday, 9 January 2015

Heart full of hearts

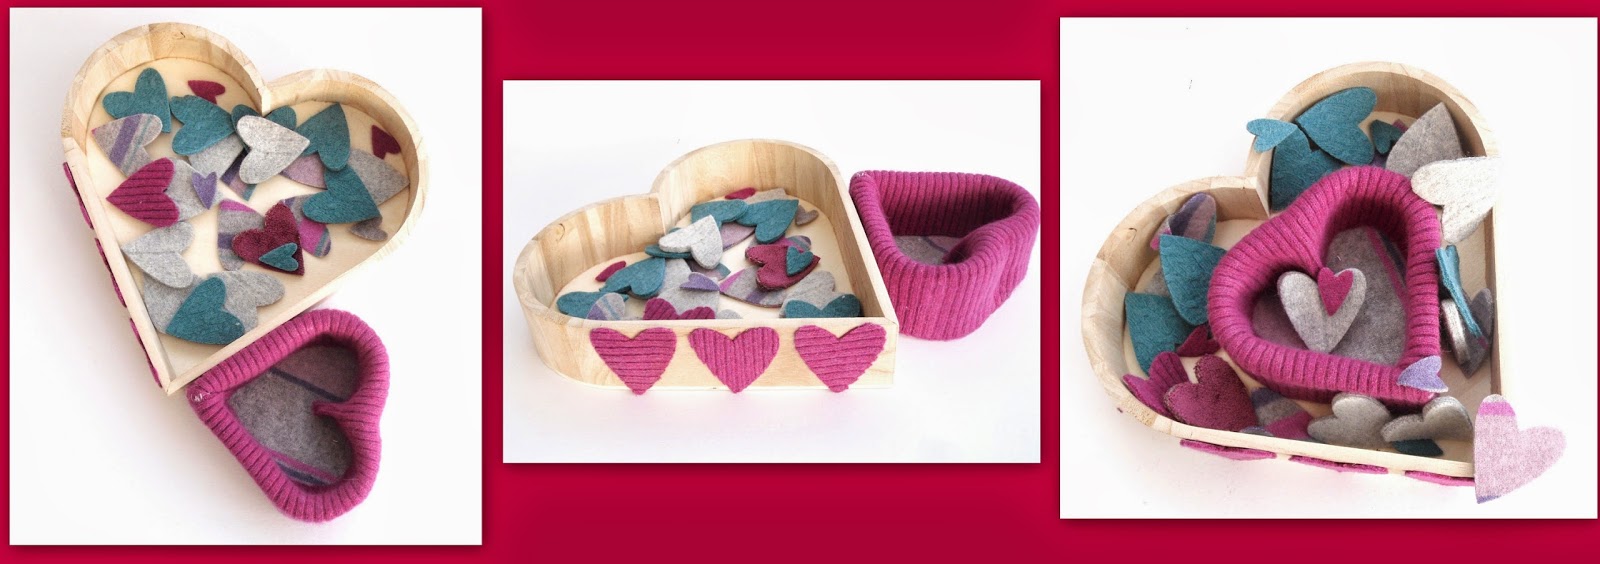
I took a little time off yesterday, away from my lap top and away from those knitting needles. I decided to have a play with some wooden heart boxes I had acquired and an idea I had to cover them with recycled felt.


I used the rib from some old sweaters I had felted to wrap round the edge of the heart shape. I didn't have any glue (why would a knitter have glue?) but I did have some fabric interfacing , so I used that, trying my best to iron it down without burning my hands in the process. I had to sew the pieces together at the heart point as there was no way it was staying stuck together. Another piece of felt I stuck (again with the fabric interfacing) to the bottom of the box


I stuck some of the recycled hearts that I use for the heart garlands I sell on to the side of the other wooden heat shape , just to see if they would stick and heh! yes they did. I now have a treasure trove of hearts , somewhere pretty to store all my spare heart shapes.

It's not a perfect technique , but i did think it was worth sharing with you all. I love recycling things and if I can make something nice and pretty out of it then that's even better.

More Free tutorials from The Feminine Touch can be found here 

Monday, 10 November 2014

A beginners perspective

 Inspired by my yarn bombing knitting colleagues that I met in York a couple of weeks ago I decided to really have a go at publishing my knitting patterns on line. 

All the knitting I do for my Etsy shop is made up from little snippets of patterns and information from elsewhere , I make some scribbles so I can make another if I need to. I had formally written up some patterns , had them for sale on Etsy but no one had purchased them. I didn't know if they worked or not.

I was told that Ravelry was the place for getting your patterns tested by both the experienced and inexperienced knitters. Great I thought , that's one way round my dilemma. So off I trotted and posted a few of the patterns I had already made on to the ravelry testing forum.

I then went to work on a new pattern, something simple I was told , something that anyone could knit up as a Christmas present using up an odd ball of yarn.

So I came up with my headband pattern , such a simple knit I thought and such a simple pattern. I put it to the testing forum on Ravelry and I also asked my Craft Britannia team mates on Etsy. 

Jill from Fabrilushus piped up saying she could only just knit , could she test it out from a beginners perspective. 

What a great idea ! so i sent her the pattern , answered a couple of her questions and off she went.

She now has finished the headband and this is what she says


"Anyway, i am finally finished! I know you have got it listed now anyway and that it is doing well but I thought you would still like my beginners perspective.

It is a great beginners pattern! Very easy knitting, grows very quickly and gives a lovely effect. I really like it. I did find the finishing off a little tricky but managed with no mishaps. 


 I found that I couldn't actually get my 3rd needle through the stitches whilst they were on 2 needles so I got around it by transferring each individual stitch on to the working needle and then knitting them together! The tieing off bit to pull it together was fine.


I think the pattern does make sense for a beginner and I love the photos.

I only have one comment where I think you could add something and it is purley for Numpty beginners like me...... you mention that if you wish to have a narrower band to just reduce the number of stitches. I think it may be worth saying that it must be an odd number of stitches otherwise the pattern will not work. I did not know that until you told me and suspect that other beginners won't.

Thank you so much for letting me test your pattern. Sorry it took an age! I am attaching photos for you. The ones of me are terrible as they are selfies with my phone but I did want you to see that the finished article is perfectly wearable. Even makes a good mini cowl and I have actually worn it like that with my coat this weekend. It works well if you don't want lots of bulk" 


 If you want to try out this same pattern , then it can be purchased here 

Monday, 3 November 2014

Angel Cable

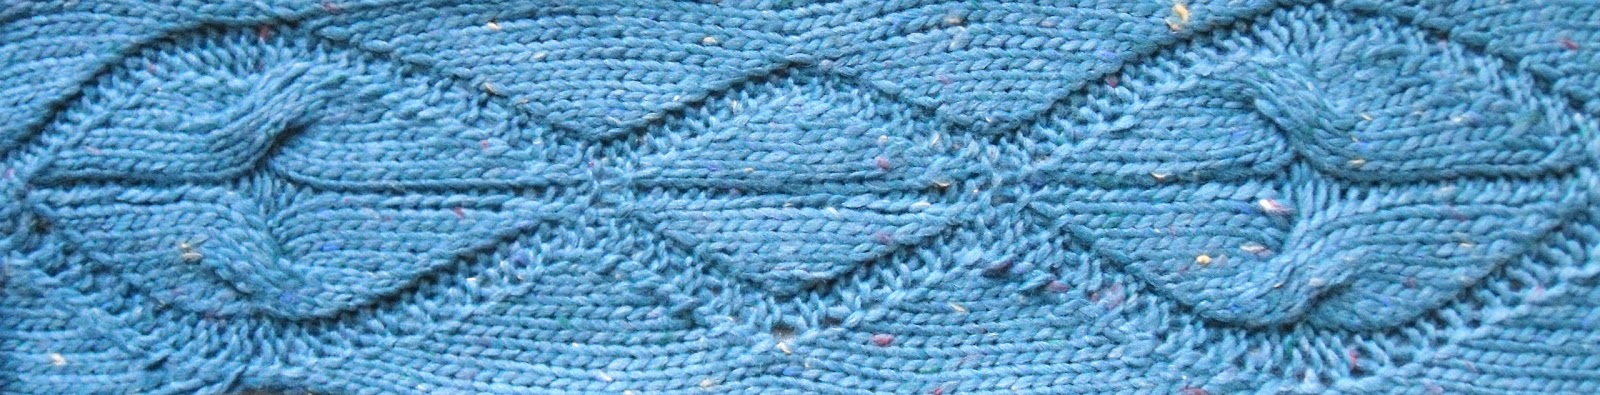
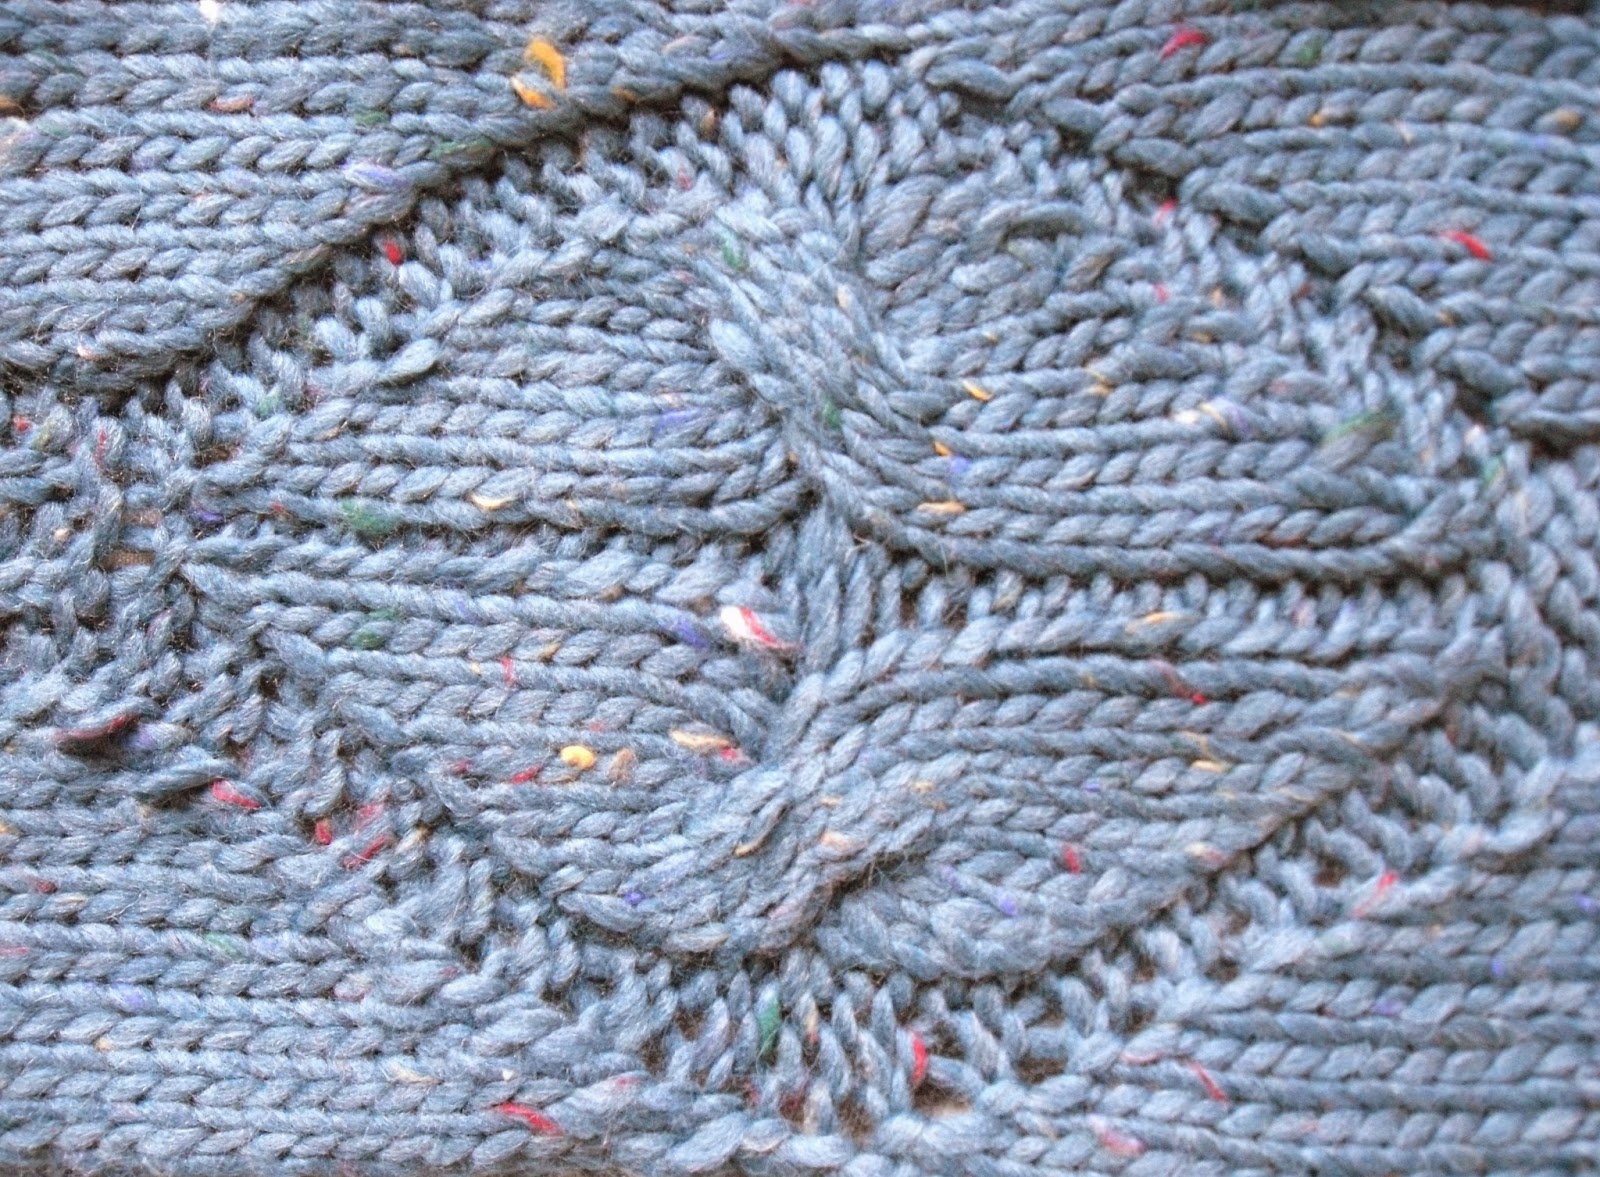
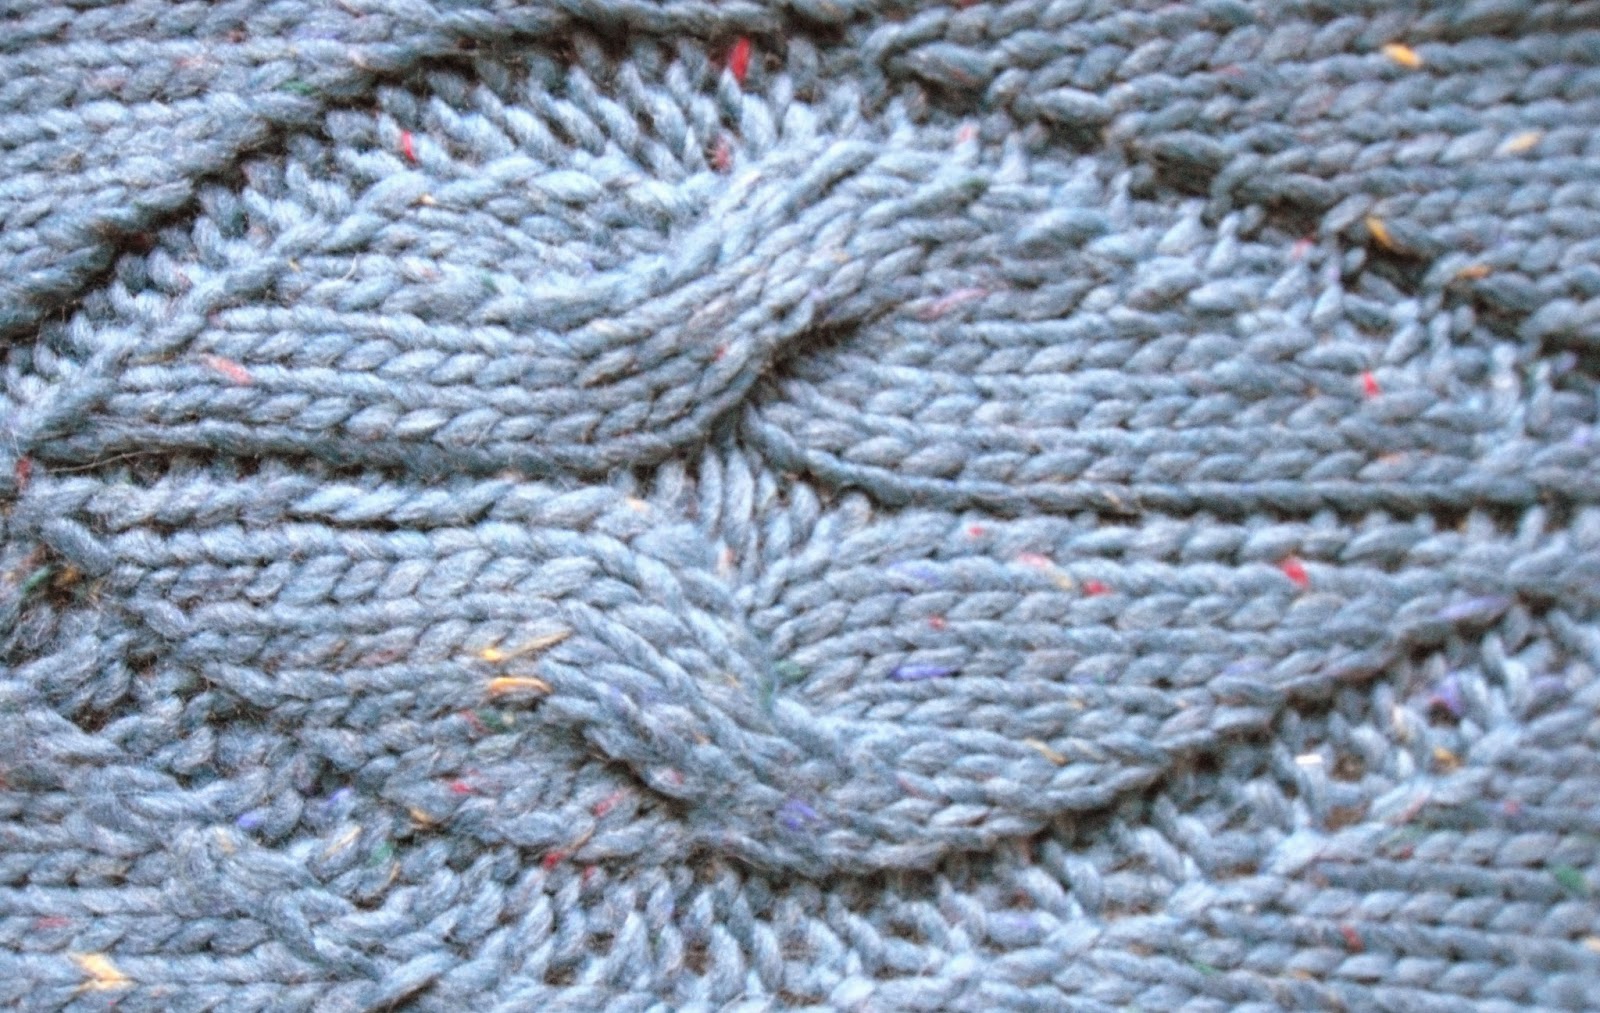
I came across a cable pattern called "Angel Cable" a few days ago and I was intrigued to try.  I have worked with cables for a few years now , just straight forward cables going up and down your work , twisting in and out of stitches, but this cable intrigued me because it was incorporated into some clever stitch increases and decreases.

I wanted to adapt the pattern I found though , wanted to make purl columns narrower , wanted a finished edge to each side, maybe with the potential of making something like a headband with it.

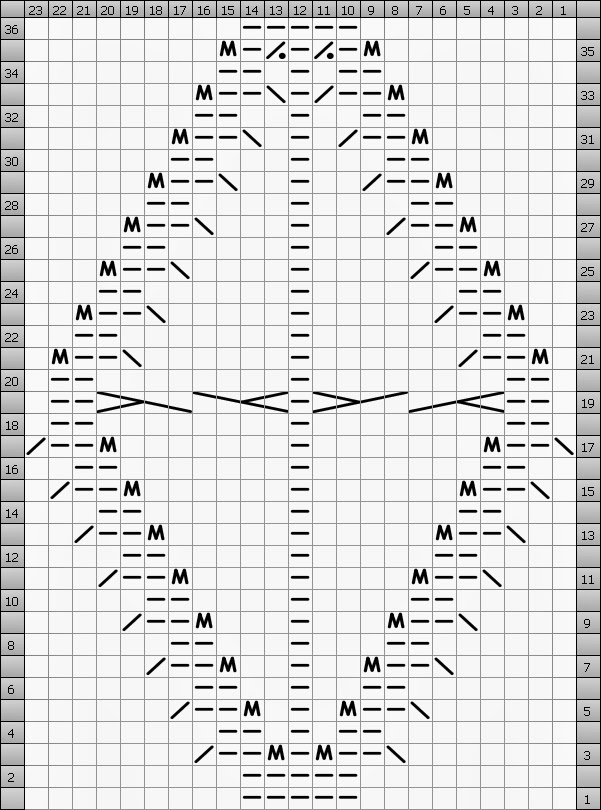
So I decided to use a little bit of software I have just bought. Nice and cheerful Interwined Studio can create charts out of written instructions or can work out the written instruction from a chart. Either way its pretty nifty and I wanted to play :)

I won't go into the ins and outs of what I did , but just to say , adapting the original pattern was a lot easier than knitting the piece and nearly as enjoyable (remember I am a computer geek).

So here's the finished results.  And yes , I did adapt the knitted piece beyond the pattern. I got carried away you see.


and for those of you interested here is the pattern , both the chart and written instructions


Cast on 26 stitches
Row 1 (rs): k9, p8, k9
Row 2 (ws): p9, k8, p9
Row 3 (rs): k7, ssk, p3, m1, p2, m1, p3, k2tog, k7
Row 4 (ws): p8, k3, p1, k2, p1, k3, p8
Row 5 (rs): k6, ssk, p3, m1, k1, p2, k1, m1, p3, k2tog, k6
Row 6 (ws): p7, k3, p2, k2, p2, k3, p7
Row 7 (rs): k5, ssk, p3, m1, k2, p2, k2, m1, p3, k2tog, k5
Row 8 (ws): p6, k3, p3, k2, p3, k3, p6
Row 9 (rs): k4, ssk, p3, m1, k3, p2, k3, m1, p3, k2tog, k4
Row 10 (ws): p5, k3, p4, k2, p4, k3, p5
Row 11 (rs): k3, ssk, p3, m1, k4, p2, k4, m1, p3, k2tog, k3
Row 12 (ws): p4, k3, p5, k2, p5, k3, p4
Row 13 (rs): k2, ssk, p3, m1, k5, p2, k5, m1, p3, k2tog, k2
Row 14 (ws): p3, k3, p6, k2, p6, k3, p3
Row 15 (rs): k1, ssk, p3, m1, k6, p2, k6, m1, p3, k2tog, k1
Row 16 (ws): p2, k3, p7, k2, p7, k3, p2
Row 17 (rs): ssk, p3, m1, k7, p2, k7, m1, p3, k2tog
Row 18 (ws): p1, k3, p8, k2, p8, k3, p1
Row 19 (rs): k1, p3, c8b, p2, c8f, p3, k1
Row 20 (ws): p1, k3, p8, k2, p8, k3, p1
Row 21 (rs): k1, m1, p3, k2tog, k6, p2, k6, ssk, p3, m1, k1
Row 22 (ws): p2, k3, p7, k2, p7, k3, p2
Row 23 (rs): k2, m1, p3, k2tog, k5, p2, k5, ssk, p3, m1, k2
Row 24 (ws): p3, k3, p6, k2, p6, k3, p3
Row 25 (rs): k3, m1, p3, k2tog, k4, p2, k4, ssk, p3, m1, k3
Row 26 (ws): p4, k3, p5, k2, p5, k3, p4
Row 27 (rs): k4, m1, p3, k2tog, k3, p2, k3, ssk, p3, m1, k4
Row 28 (ws): p5, k3, p4, k2, p4, k3, p5
Row 29 (rs): k5, m1, p3, k2tog, k2, p2, k2, ssk, p3, m1, k5
Row 30 (ws): p6, k3, p3, k2, p3, k3, p6
Row 31 (rs): k6, m1, p3, k2tog, k1, p2, k1, ssk, p3, m1, k6
Row 32 (ws): p7, k3, p2, k2, p2, k3, p7
Row 33 (rs): k7, m1, p3, k2tog, p2, ssk, p3, m1, k7
Row 34 (ws): p8, k3, p1, k2, p1, k3, p8
Row 35 (rs): k8, m1, p2, p2tog, p2, p2tog, p2, m1, k8
Row 36 (ws): p9, k8, p9


Monday, 16 June 2014

Mesh Pattern

Just thought I would share this great mesh pattern I found.

I've used it in my new hot water bottle covers, great for a bit of interest and to thread a tie through.


here's the instructions....


Thursday, 27 February 2014

Bunches of Grapes

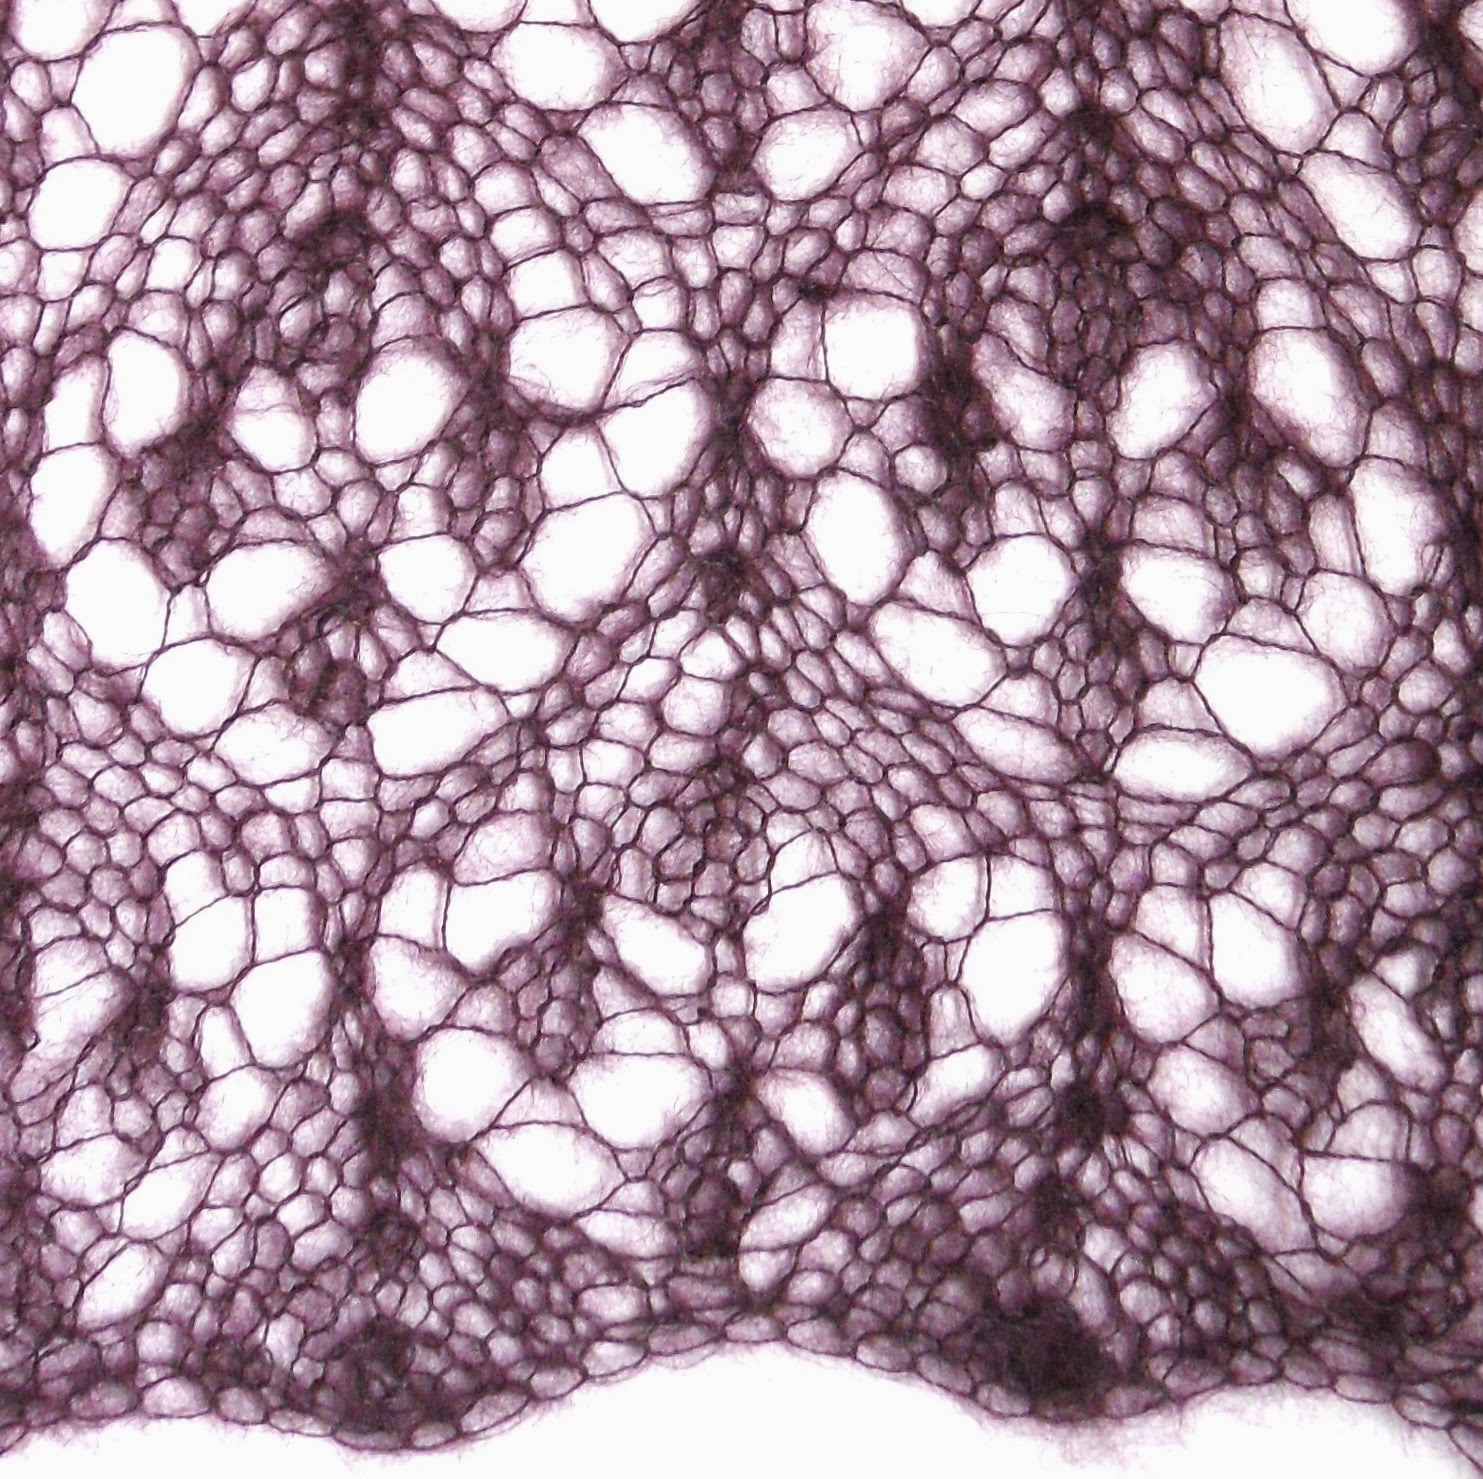
I have used the stitch pattern below and incorporated it in to one of my mohair lace scarves.

I have had some brilliant comments from people as to how beautiful the pattern is, so I thought I would share it with you. It did take me a little time to understand each row and there are still a couple of rows that I find a little confusing, so you may need to concentrate extra hard to get through those.

https://www.etsy.com/uk/listing/180625821/lace-scarf-shawl-hand-knitted-goth-wine


I used Rowan's KidSilk Haze yarn on 7mm knitting needles.

Instructions

Cast on a multiple of 10 + 1 stitch. 

Suggest you add on a few stitches (say 3 ) to use for selvedge stitches and then knit these 3 stitches at each end of the row on ALL rows. 

The stitches in the square brackets [] are the pattern repeat. If you make the item wide enough you can get in to a routine with these. 

The stitches at the beginning of the row tend to mimic the end of the pattern repeat and replace the k3tog by a k2tog or a k3 by a k2. Same with the stitches at the end of the row, they mimic the start of the pattern repeat in the same way.


Row 1: k2tog, k3, [ yo, k1, yo, k3, k3tog, k3 ] , repeat [] to last 6 sts, then yo, k1, yo, k3, k2tog.


Row 2 and every even numbered row: purl all stitches.


Row 3: k2tog, k2, yo, [ k3, yo, k2, k3tog, k2, yo ] , repeat [] to last 7 sts, k3, yo, k2, k2tog.


Row 5: k2tog, k1, yo, k1, [ yo, k3tog, yo, k1, yo, k1, k3tog, k1, yo, k1 ] , repeat from [] to last 7 sts, then yo, k3tog, yo, k1, yo, k1, k2tog.


Row 7: k2tog, yo, k2, [ k5, yo, k3tog, yo, k2 ], repeat [] to last 7 sts, then k5, yo, k2tog.


Row 9: k2, yo, k3tog, [ yo, k1, yo, k3tog, yo, k3, yo, k3tog ], repeat [] to last 6 sts, then yo, k1, yo, k3tog, yo, k2.


Row 11: knit all stitches.


Row 13: k1, yo, k2, [ k1, k3tog, k3, yo, k1, yo, k2 ] , repeat from [] to last 8 sts, then k1, k3tog, k3, yo, k1.


Row 15: k2, yo, k1, [k1, k3tog, k2, yo, k3, yo, k1], repeat from [] to last 8 sts, then k1, k3tog, k2, yo, k2.


Row 17: k2tog, yo, k1, yo, [ k1, k3tog, k1, yo, k1, yo, k3tog, yo, k1, yo ], repeat [] to last 8 sts, then k1, k3tog, k1, yo, k1, yo, k2tog.


Row 19: k4, [ yo, k3tog, yo, k7 ], repeat from [] to last 7 sts, then yo, k3tog, yo, k4.


Row 21:k1, yo, k3tog, yo, [ k3, yo, k3tog, yo, k1, yo, k3tog, yo ], repeat [] to last 7 sts, then k3, yo, k3tog, yo, k1.


Row 23: knit all stitches.


Repeat rows 1-24 till necessary for completing your item.


Have fun x 


Tuesday, 11 February 2014

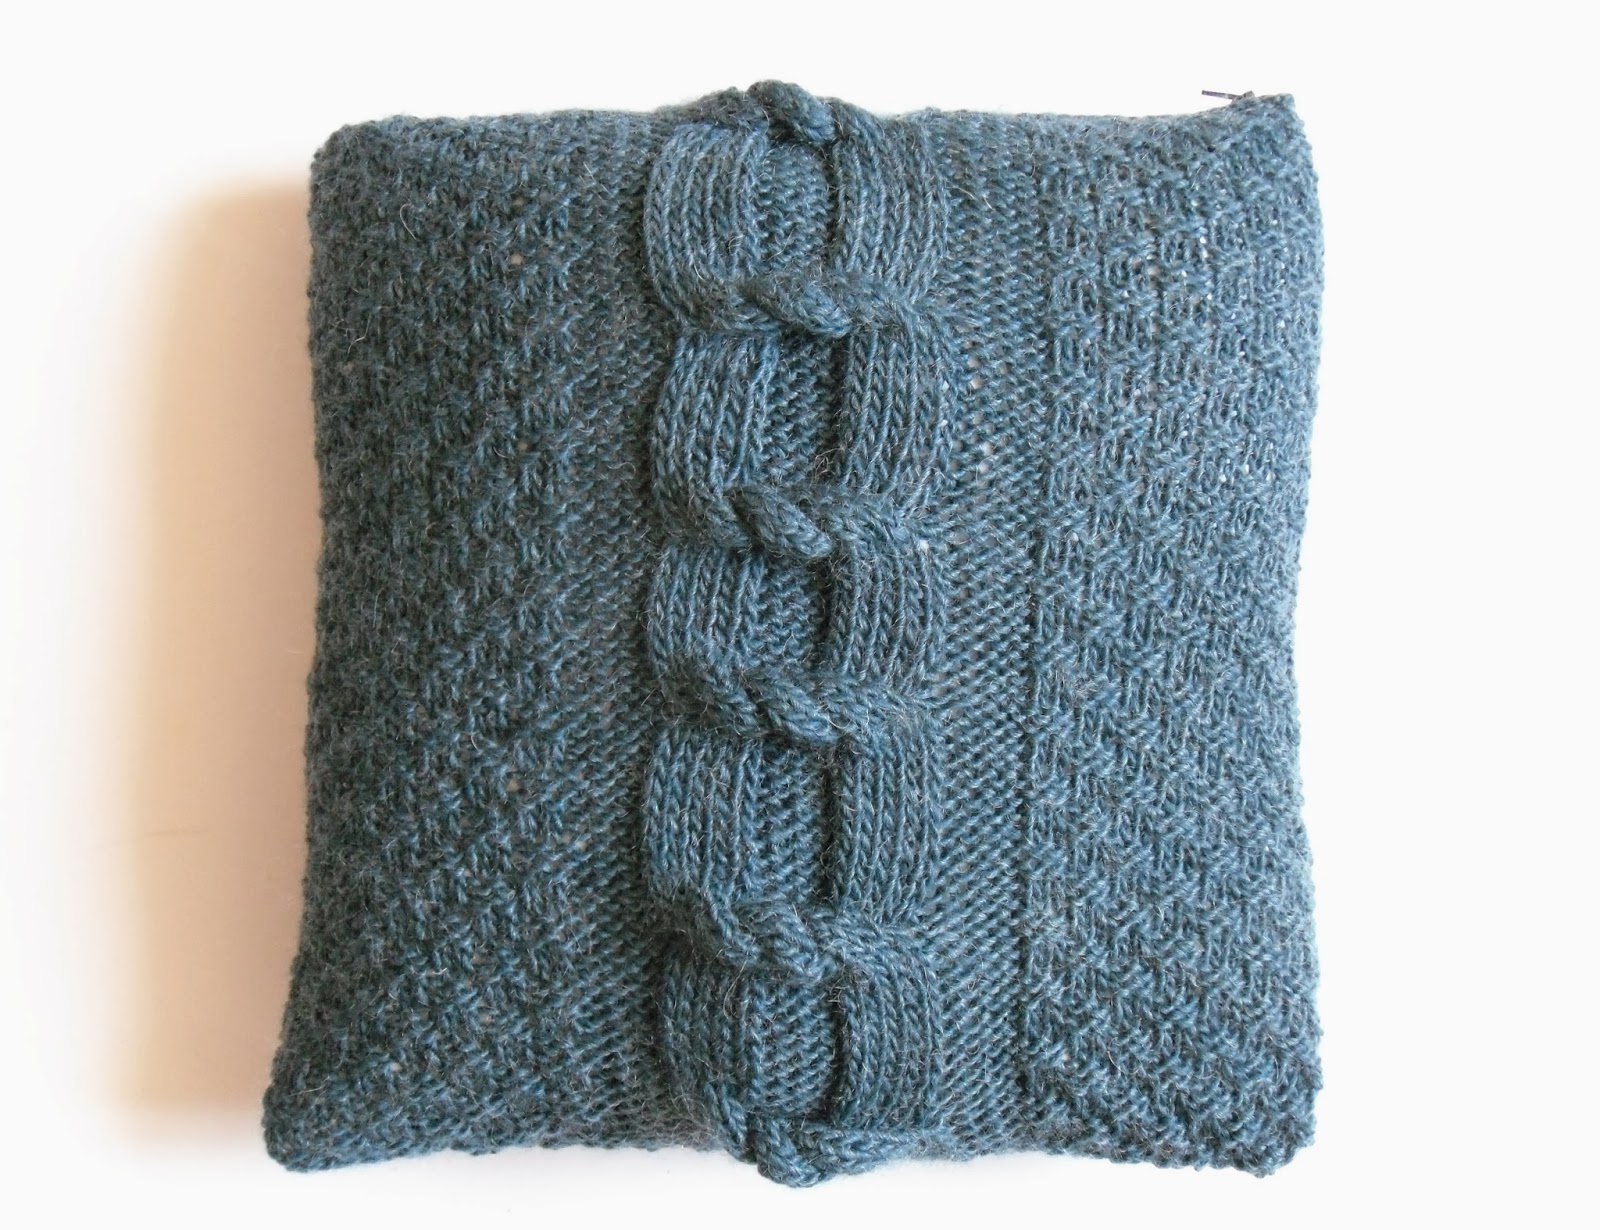
Free Tutorial - Big Cable Cushion Cover


This cushion cover is knitted in 2 parts, with seams on 3 sides and then a zip fastening on the 4th side. It is assuming some knitting knowledge as the pattern for one of the sides will not explain the pattern row by row but will explain it in sections of knitting.


**** If you love the cushion but are unable to knit it , then why not purchase it from The Feminine Touch Designs here 


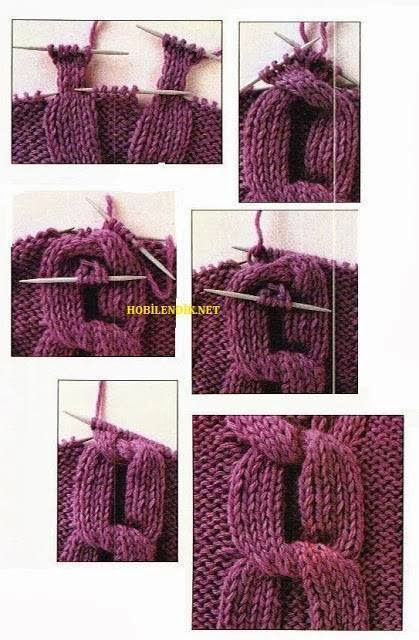
The pattern has been inspired by a cable pattern I learnt at a Rowan Workshop back in 2012 called “Big Cables” held by Martin Storey.


A few days ago, the same "Big Cable" popped up on my facebook notifications. I knew I just had to knit the pattern again and share it with you too.  I have used the same photo explaining the big cable in my pattern, as I found it so easy to follow.


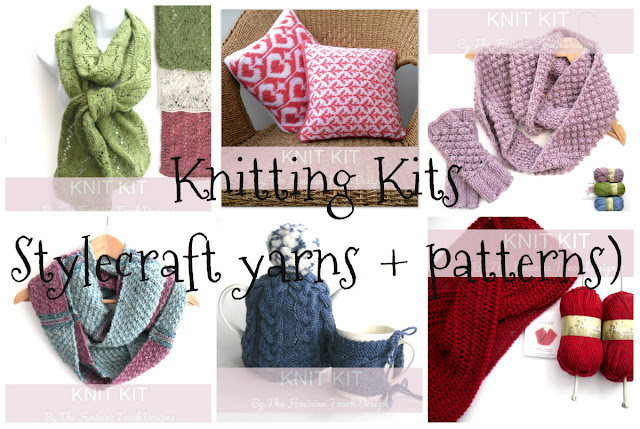
 The Feminine Touch Knitting Kits


What you will need 


  • 3 100G balls of Rowan cocoon yarn (80% wool, 20% mohair)
  • 6.5mm (UK 3, US 10.5) needles
  • Darning needle and a sewing needle
  • Straight pins
  • 14” zip that coordinates with the cushion
  • Matching sewing cotton
Stage 1 - Side 1 (2 stitch basket weave)
 
Cast on 50 stitches


Row 1     Knit 2, Purl 2 ........
till last 2 stitches then Knit 2
Row 2     Purl 2, Knit 2 ....... till last 2 stitches then Purl 2
Row 3     Purl 2, Knit 2 ........till last 2 stitches then Purl 2
Row 4     Knit 2, Purl 2 ........till last 2 stitches then Knit 2


These 4 rows set the pattern. Repeat these 4 rows 20 times more
 

Cast off
 

Stage 2 - Side 2 (Big Cable side)
 
Cast on 55 stitches 


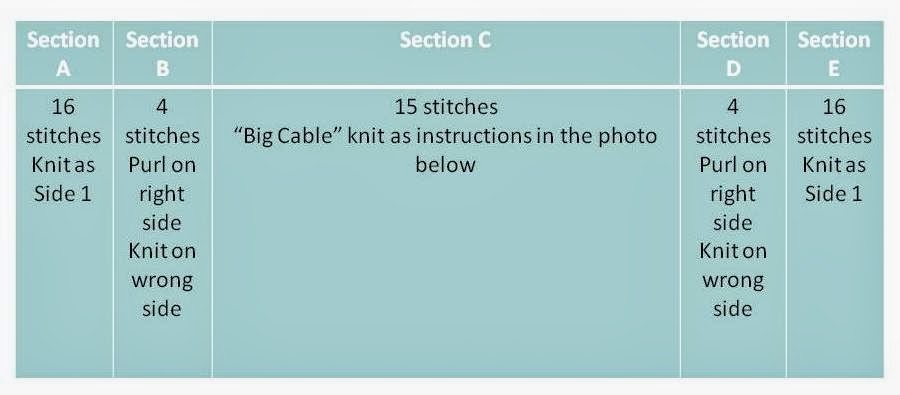
The pattern is broken down in to 5 sections (A – E)


PS - If you get stuck following the pattern from the photos , then please email me and I'll help you all I can.     Or full instructions for the cable knot are included in my hot water bottle cover pattern .

Knit a total of 84 rows
 

Cast off 

Stage 3 - Sew the zip in place 

 
With the zip closed and the right side of the knitting facing up, pin one side of the zip to the cast off edge of side 1, so that the knitting covers as much of the fabric part of the zip as possible.
 

Using matching thread, sew the zip to the project from the front, placing your stitches as close to the zip mechanism as you can, and taking care to make your stitches as invisible as possible.
 

Pin the second side of the zip to the cast off edge of side 2 in the same manner, unzipping the zip if necessary.
 

Sew this side from the front in the same way as before.
 

Turn the cushion to the wrong side and sew the zip flaps to each side, again trying to make your stitches invisible.

Stage 4 – Finishing off 

 
Make sure you have the right sides facing you
 

Use one of the tail ends at either the cast on or cast off row and thread the darning needle with it
 

Use mattress stitch to join the sides.


Please feel to make as many of these as you like for personal use, but I would ask that you don't sell the finished items. Please do not reproduce any or all of the tutorial, without linking back to here.


Did you know ! Cables for the home are TRENDING NOW!


Heh !  If you like this free pattern and want to know as soon as I write another , then why not like my Facebook Page!


Friday, 31 January 2014

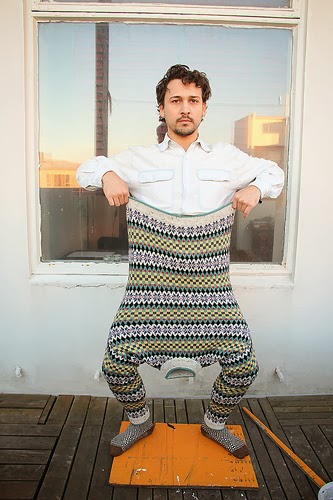
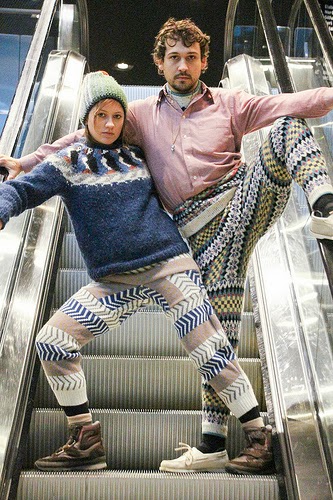
Swants Tutorial

Morning all 

Just found this amazing tutorial I had to share with you all. Its a bit wacky , the photos are fun , the idea is cheap to make (as long as you are happy to scour charity shops like I do) and the end result is stunning

Love , love , love this one

From this.....

http://westknits.com/index.php/2013/11/swants-tutorial/
  to......

http://westknits.com/index.php/2013/11/swants-tutorial/ 


Click on the photos or the link above to be taken to the tutorial

Just wish I had thought of it first :(


More Free tutorials from The Feminine Touch can be found here 

Tuesday, 7 January 2014

My 1st New Years Resolution - DONE

At the very end of last year , I endeavoured on a little project , aimed at trying to get more views to this blog and also the one at Uniquely UK. I was inspired by my friend Simmi , who was already doing the same. Both of us wrote some little freebie tutorials , simple instructions with whacking results. The number of views we get from these postings on a daily basis is stupendous!

I'd always planned that one year I would expand my little hobby to include selling knitting patterns that I had designed and written up. Well this year is that year! It came to me out of the blue again last week , and here I am a week later with 2 knitting patterns under my belt and another that is in the finishing stages.

Its a brilliant feeling to see my patterns written up professionally instead of scribbled on bits of paper that I lose on a daily basis. For me , it means that I don't have to rethink how to knit something I designed , I can just refer to my own pattern. The stress of those custom orders has gone away! 

But most importantly I can get my designs out there in the public domain. Yes some I will charge for (only £2.80 at the moment) and others I will post on my blog for free. I'll be offering tips and guidance on my blog too, just to help people get started or help them get over a difficult concept. 

So this is my 1st New Years Resolution DONE !. Now I have started , believe you me , I will continue , for this year and beyond.

Happy knitting ..........

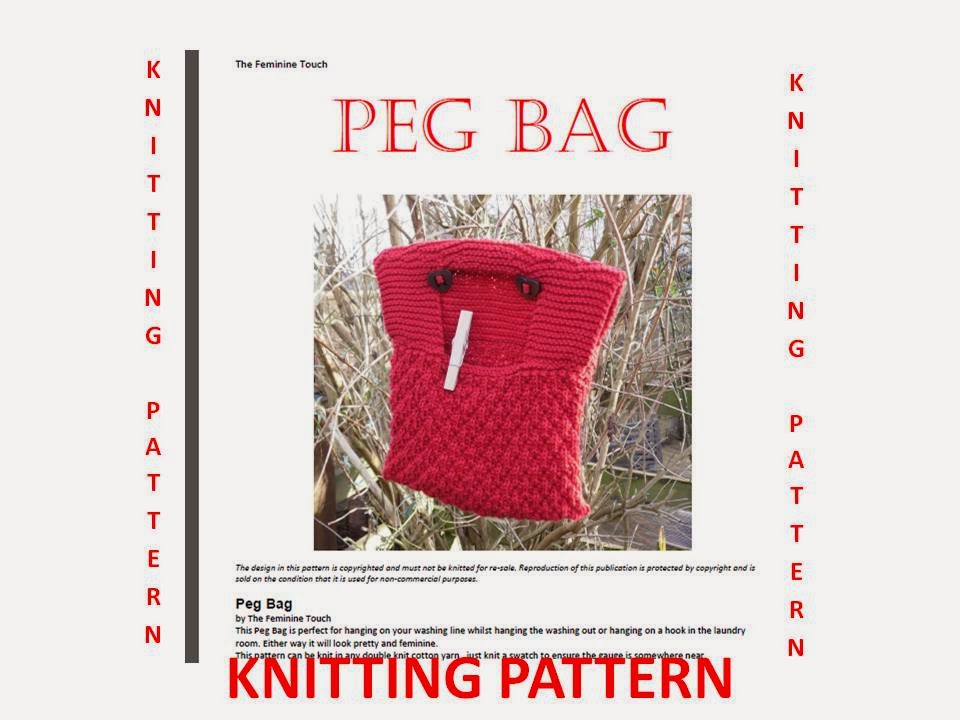
Peg Bag knitting pattern
Hot water bottle cover knitting pattern

Monday, 16 December 2013

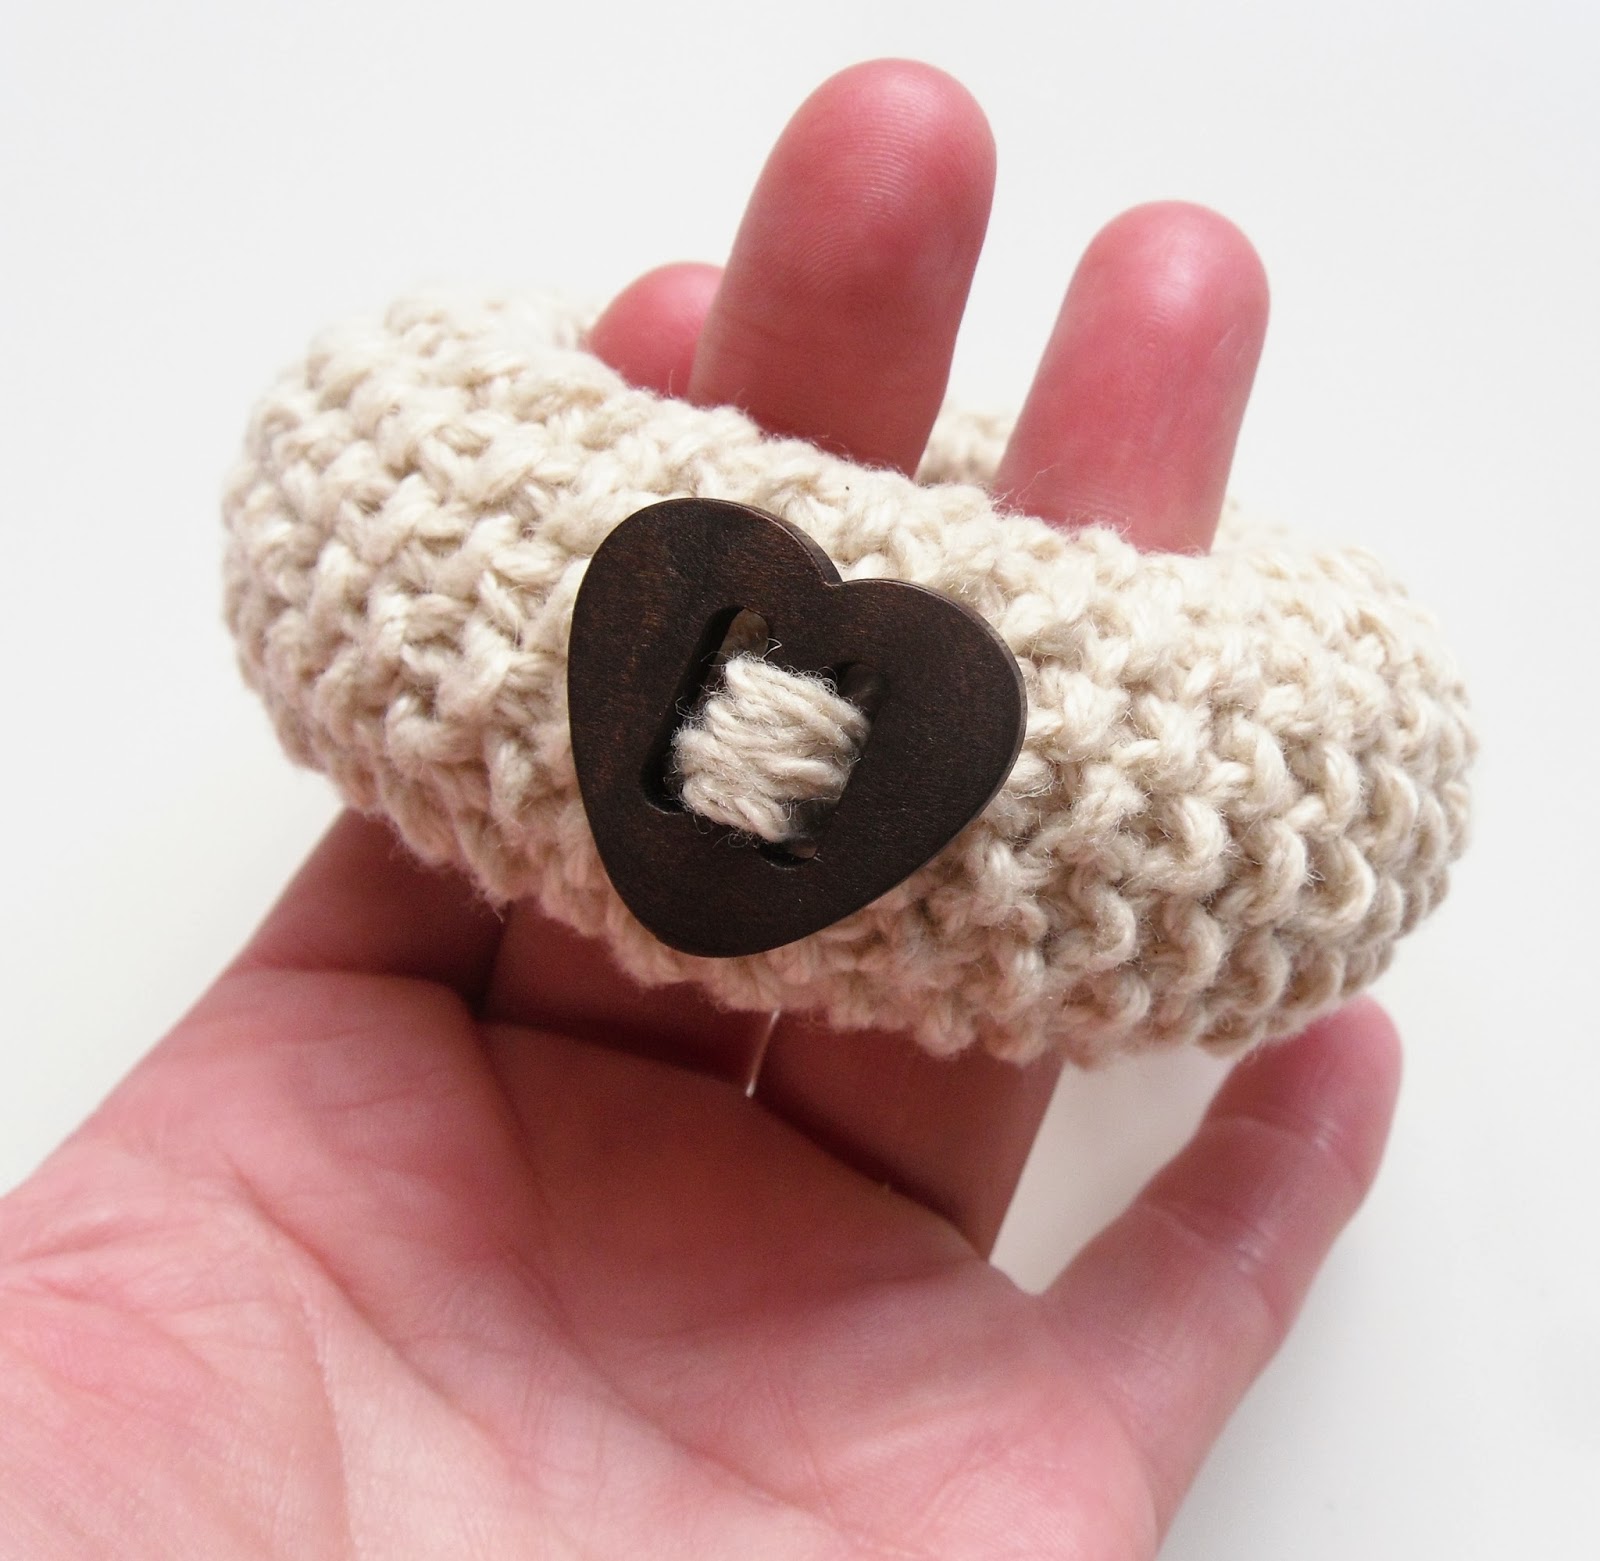
Free Tutorial - Knitted child's bracelet

During the autumn I was asked by one of my friends if I could possible knit a chunky bracelet for her youngest daughter. 

I have finally got round to writing up the process for you all.


For this project you will need 


1 wooden bracelet with a diameter of approx 88mm 

and a dark wooden button
Small quantity of cream cotton yarn


Instructions 


Step 1. With cream cotton and appropriate sized knitting needles (see ball band) Cast on enough stitches to make the width of knitted item twice the width of the bangle. For the bangles I used  , the width was 23mm , so my knitting was 46mm using 4mm needles.


Step 2. Knit in Moss stitch
Row 1 K1, P1, K1 , P1 .............K1
Row 2 Same as Row 1

Repeat these 2 rows until the length of the knitting measures the circumference of the bangle. Check this out by wrapping the knitting round the bangle before you do the final cast off.

Step 3 Cast off

You should end up with a cream band , approx 88mm x 46 mm.

Step 4. Sew button on to cream band in a central position.

Step 5. Sew 2 narrow ends of band together

Step 6. Place band around wood bangle and sew in place , align stitches to be in the  middle of the inside of the bangle.

Step 7. Sew in any ends.


Hope you will enjoy making this child's bracelet. 


Remember, if you make any of these lovely bracelets , then send photos to TheFeminineTouch and I will feature them on facebook or in my blog (or both).
Please feel to make as many of these as you like for personal use, but I would ask that you don't sell the finished items. Please do not reproduce any or all of the tutorial, without linking back to here.

 The Feminine Touch Knitting Kits


Heh !  If you like this free pattern and want to know as soon as I write another , then why not like my Facebook Page!


Quick View of Woolly Goodies available on my web site

Quick View of Woolly Goodies available on my web site
Click on photo above to see detail / to purchase