Showing posts with label homewares. Show all posts

Tuesday, 24 February 2015

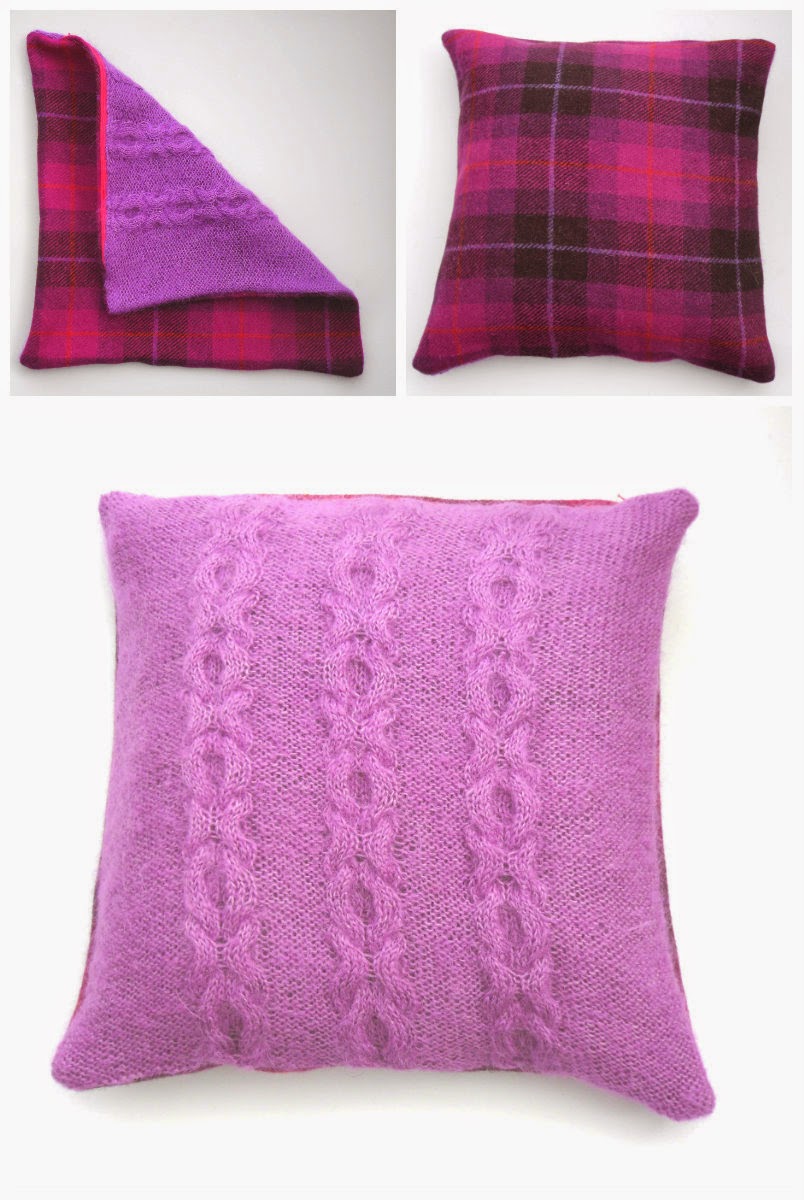
Scrumptious Harris Tweed / Mohair Pillows

I fell in love with these pillows when I made the purple/ black combination one a few months back.

A wonderful lady from Canada purchased a set of 4 and wiped me out of my purple / black Harris Tweed for now. 

Anyway I set to and knit the back of the pillow for a gorgeous stunning pink tartan Harris Tweed. 

This pillow is larger than normal size , it's 17" x 17" and the price reflects this , sorry but its £55. 

I can make theses cushions up in a range of Harris Tweed and mohair colours and obviously sizes too. 

Interested? just contact me 


Sandra


Monday, 22 September 2014

Hebridean Tweed

I was intrigued , off to the Isle of Harris and I hadn't twigged that the "Harris Tweed" offcuts I had been using in my heart garlands originated from there.


 It wasn't until someone said to me "look out for the weavers" that it set something off in my tiny brain. 

Ah Ah , must find the weavers on the Isle of Harris.......and so i did , sort of. I hunted and asked around , but the majority of the Harris Tweed made on the hebridean islands is not actually made on the Isle of Harris but The Isle of Lewis. So what does that entail ? how many ferries did I have to catch to get on to another hebridean island , well none , both Harris and Lewis are joined together to form one larger island. So all it took was a drive around the west coast of Harris , past all the beautiful stunning beaches , up to Lewis.

 Carloway is the home of one of the weavers who has a number of weaving looms set up in his shed. When you walk into his little empire straight away he rushes over to give you his demonstration of how he weaves his Harris Tweed. 

He had one of his looms set up with this glorious pattern


but he showed me how he weaves on this loom.


I won't go in to the detail of what he does , but it involves peddles that he uses like on a piano and shuttles that are full of yarn that go back and forth between the warp or is it weft) . 


and the whole thing is programmed using these strips , which determine which shuttles (these contain the coloured yarns) go through at what time. A bit like the puch card and paper tapes that were used to program computers back in the 70's.

I think the bit that really excited me was that these Hattersley looms came from Keighley, West Yorkshire , about 12 miles away from my home town of Halifax. I was so proud .....


authentic harris tweed

Please read the official harris tweed blog for more interesting information on this great woolly product , hand made on the most beautiful of our british isles.


 You will see harris tweed products spring in to life in my shop over the coming months. Hope you like them.

Monday, 7 April 2014

Home Sweet Home

My daughter Michelle moved in to her new home in January and this weekend was my first visit. Just thought I would share some of the crafty things I spotted in her house. It was lovely to see how she showed off her work (and mine) for her friends and family to see.


1. One of my knitted cotton peg bags , well used and full of pegs. You can buy these here or best of all , you can knit your own with your very own knitting pattern

2. Framed pieces of fabric. Very stylish and chic and best of all - cheap !

3. One of my fair isle knitted cushion covers snook its way into this woodland display.

4. One of Michelles "HOME" buntings hung over the fireplace. [NB. Don't worry the electric fire never gets turned on].

Just had to share

Tuesday, 11 February 2014

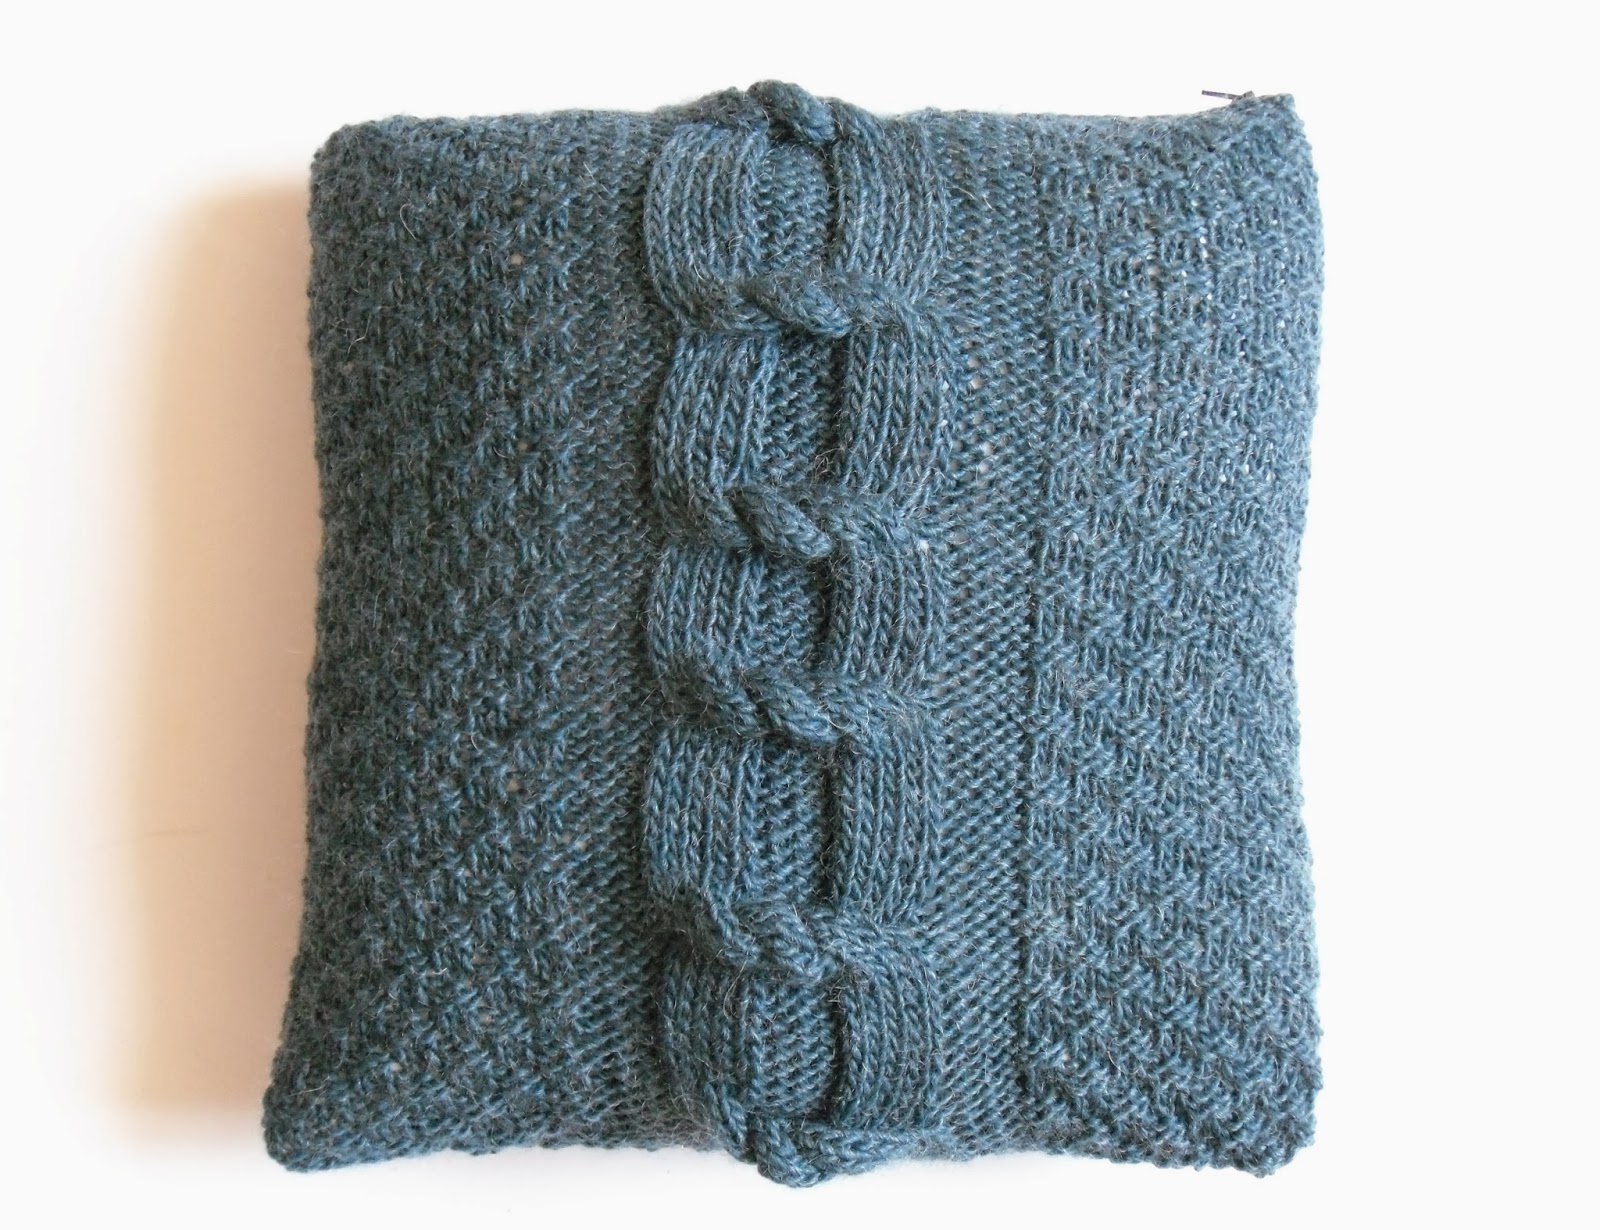
Free Tutorial - Big Cable Cushion Cover


This cushion cover is knitted in 2 parts, with seams on 3 sides and then a zip fastening on the 4th side. It is assuming some knitting knowledge as the pattern for one of the sides will not explain the pattern row by row but will explain it in sections of knitting.


**** If you love the cushion but are unable to knit it , then why not purchase it from The Feminine Touch Designs here 


The pattern has been inspired by a cable pattern I learnt at a Rowan Workshop back in 2012 called “Big Cables” held by Martin Storey.


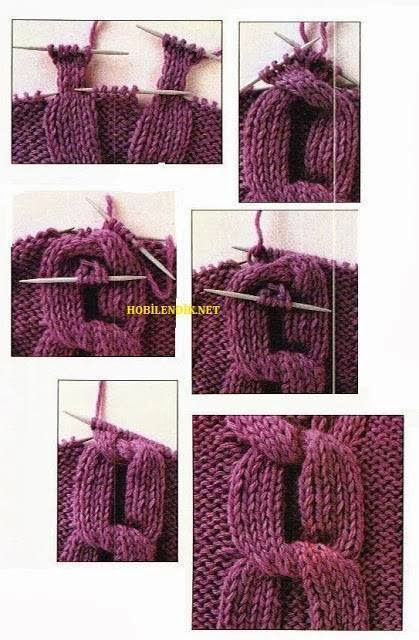
A few days ago, the same "Big Cable" popped up on my facebook notifications. I knew I just had to knit the pattern again and share it with you too.  I have used the same photo explaining the big cable in my pattern, as I found it so easy to follow.


 The Feminine Touch Knitting Kits


What you will need 


  • 3 100G balls of Rowan cocoon yarn (80% wool, 20% mohair)
  • 6.5mm (UK 3, US 10.5) needles
  • Darning needle and a sewing needle
  • Straight pins
  • 14” zip that coordinates with the cushion
  • Matching sewing cotton
Stage 1 - Side 1 (2 stitch basket weave)
 
Cast on 50 stitches


Row 1     Knit 2, Purl 2 ........
till last 2 stitches then Knit 2
Row 2     Purl 2, Knit 2 ....... till last 2 stitches then Purl 2
Row 3     Purl 2, Knit 2 ........till last 2 stitches then Purl 2
Row 4     Knit 2, Purl 2 ........till last 2 stitches then Knit 2


These 4 rows set the pattern. Repeat these 4 rows 20 times more
 

Cast off
 

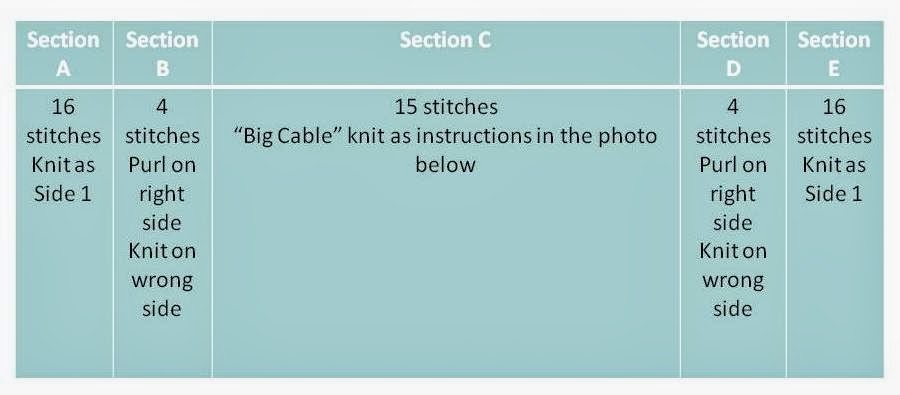
Stage 2 - Side 2 (Big Cable side)
 
Cast on 55 stitches 


The pattern is broken down in to 5 sections (A – E)


PS - If you get stuck following the pattern from the photos , then please email me and I'll help you all I can.     Or full instructions for the cable knot are included in my hot water bottle cover pattern .

Knit a total of 84 rows
 

Cast off 

Stage 3 - Sew the zip in place 

 
With the zip closed and the right side of the knitting facing up, pin one side of the zip to the cast off edge of side 1, so that the knitting covers as much of the fabric part of the zip as possible.
 

Using matching thread, sew the zip to the project from the front, placing your stitches as close to the zip mechanism as you can, and taking care to make your stitches as invisible as possible.
 

Pin the second side of the zip to the cast off edge of side 2 in the same manner, unzipping the zip if necessary.
 

Sew this side from the front in the same way as before.
 

Turn the cushion to the wrong side and sew the zip flaps to each side, again trying to make your stitches invisible.

Stage 4 – Finishing off 

 
Make sure you have the right sides facing you
 

Use one of the tail ends at either the cast on or cast off row and thread the darning needle with it
 

Use mattress stitch to join the sides.


Please feel to make as many of these as you like for personal use, but I would ask that you don't sell the finished items. Please do not reproduce any or all of the tutorial, without linking back to here.


Did you know ! Cables for the home are TRENDING NOW!


Heh !  If you like this free pattern and want to know as soon as I write another , then why not like my Facebook Page!


Sunday, 2 February 2014

My craft room (part 1)

Woop ! I’m getting a little giddy. 

My new pad is almost ready for me to move in :)

My new pad , is my new craft room in my partners house. He has asked me to move in after 16 years ! together , and after I redecorated some of the bedrooms and started work on the craft (my) room , I said “Yes” . 

My craft room is the little bedroom , that used be kitted out with young girls cartoon doggy wall paper and matching curtains and lampshade.   His daughter uses that room when she comes to visit and is now 26 , so very much time for a change! The only conditions I was given was that the single bed stays in the room (so she can still come and visit ~ of course) and that I would replace the wallpaper with something bright and feminine. 

The rooms not quite finished , there are still shelves to put up, books to be organised , curtains to be made (maybe) but I couldn’t resist showing you what’s already been done. 


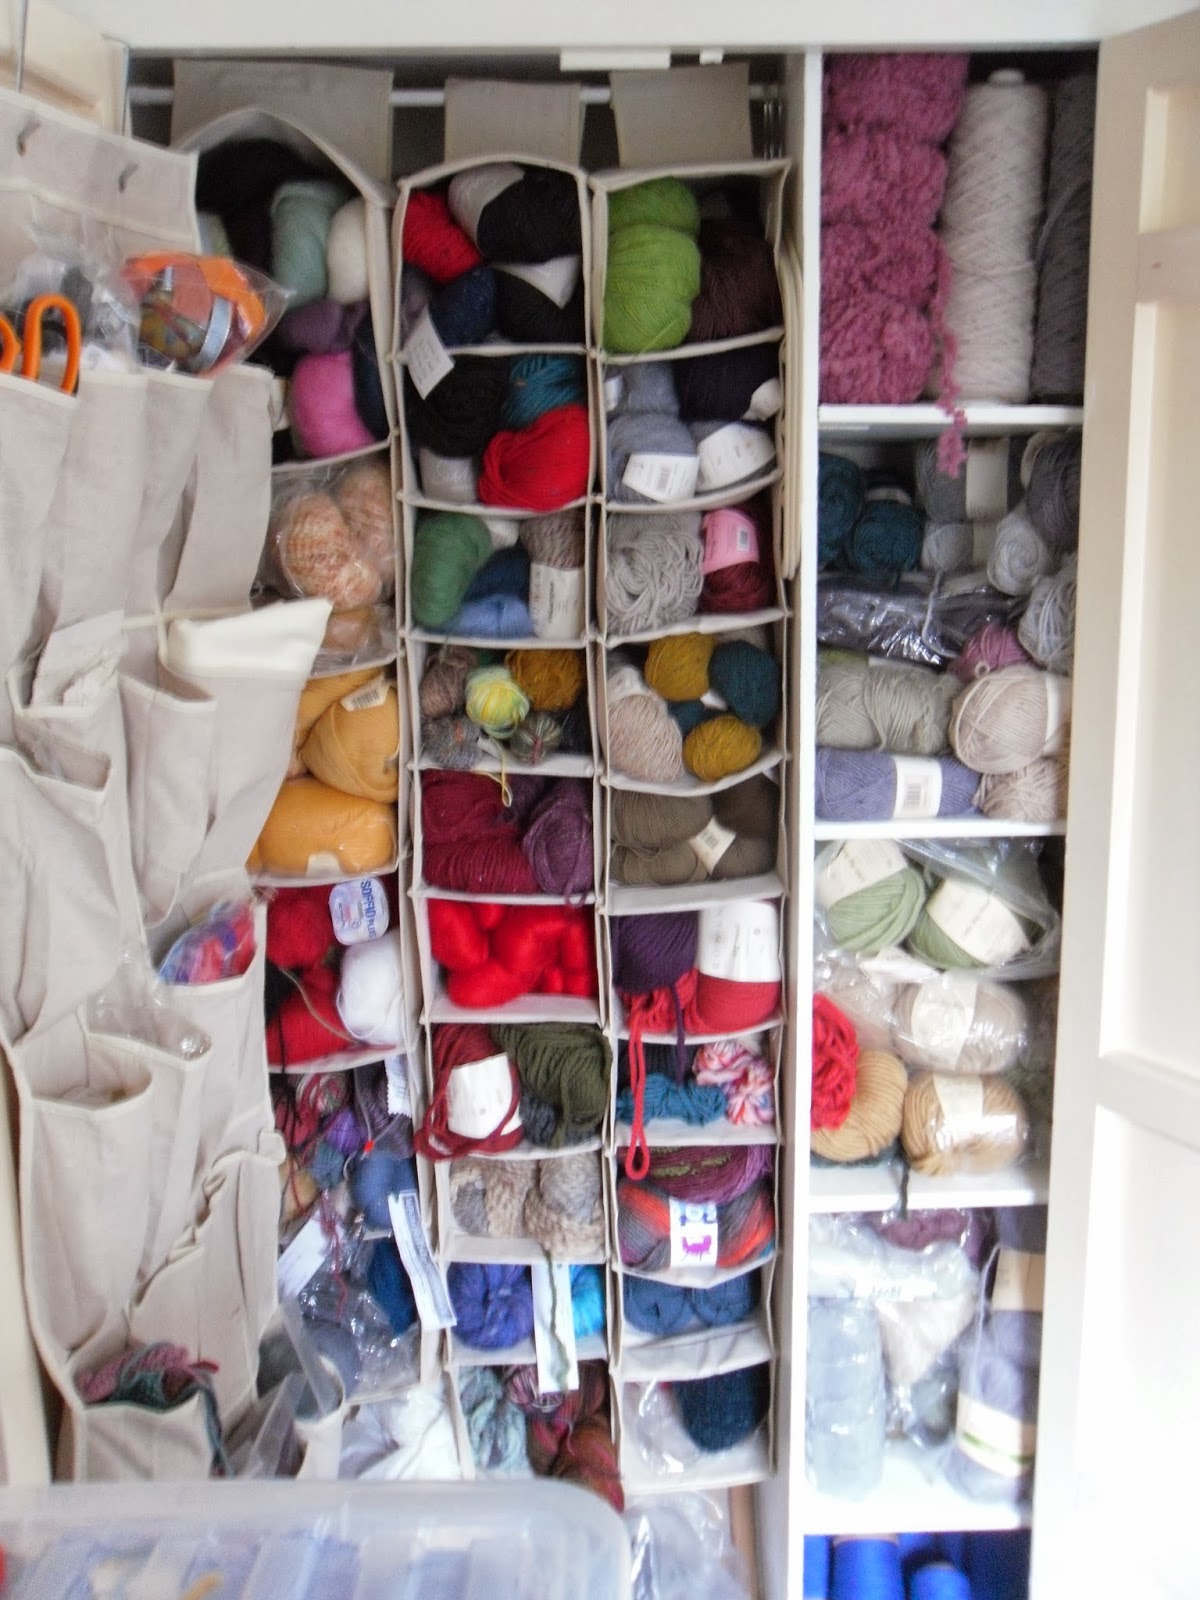
The built in wardrobe has been turned in to my yarn store. I have used those flexible storage (for shoes and sweaters) shelves to organise my yarns. These hang down from the wardrobe rail and cost me around £12 for 3 sets, that’s all. 


There were already some shelves to the right which I used for more yarn. I have used one of those shoe tidies to hang over the wardrobe door for spaces to organise yet more stuff. Bags and boxes of yarn that I have yet to sort through have been stuffed up into the top cupboard.  You know something , I love this , it’s great to start a knitting project and go for a browse in your very own yarn store. 


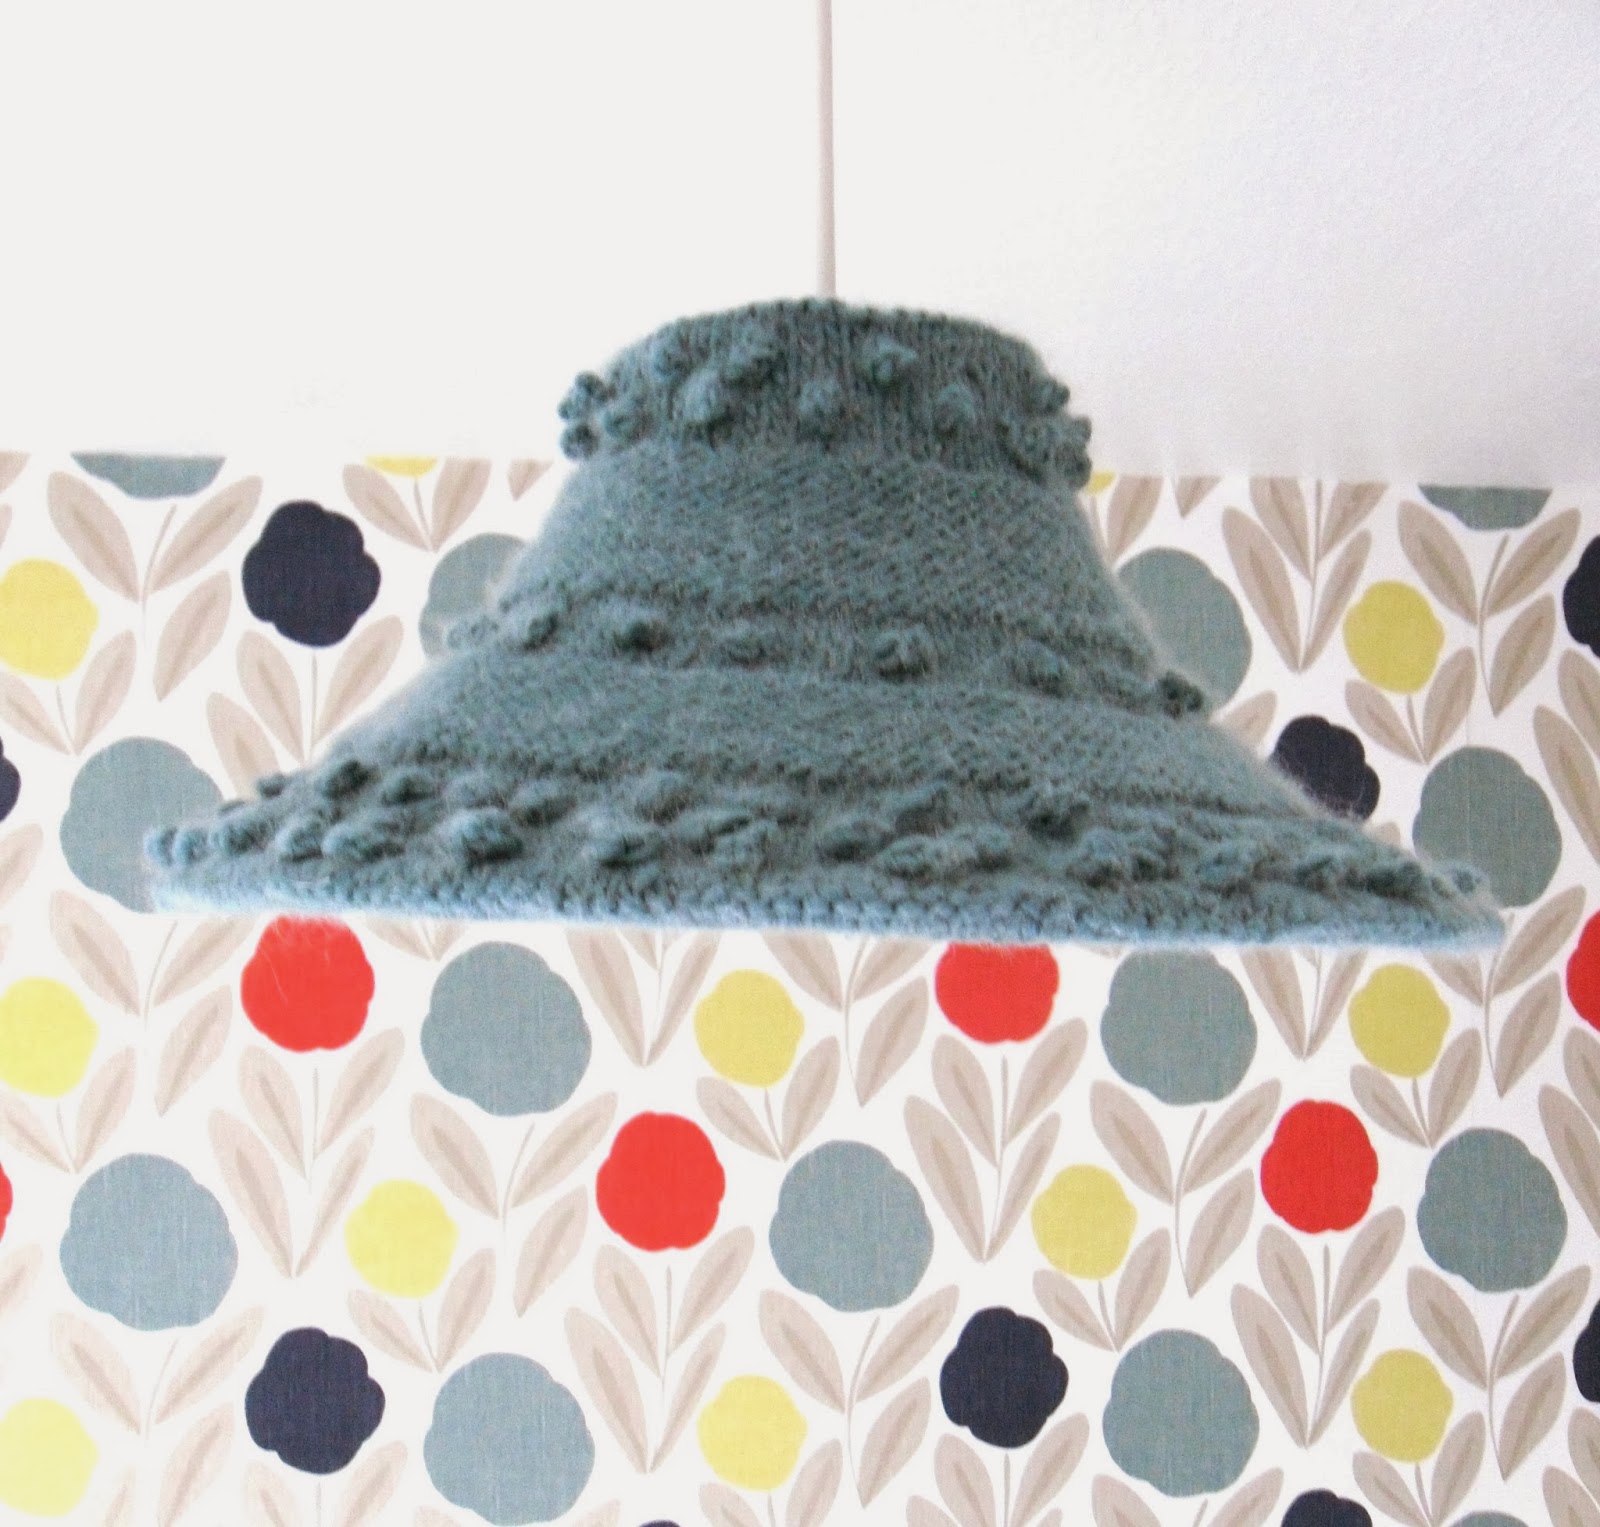
I just had to get rid of the silly girly lampshade. I wanted something original and unique and something to show off my craftiness. The knitted lampshade was inspired by some photos I had seen on the Internet. Knitting a lampshade seemed the logical conclusion, all it took was a bit of maths brainpower to calculate how many stitches to use and how often I need to decrease to make the lampshade shape.  The only thing that concerned me was ensuring the shade was fire resistant , otherwise I would never dare turn the light on. I was helped out by one of UUK colleagues , who advised me of some fire resistant spray to use , Phew , all sorted. 


Please come back to see part 2 of my craft room


Quick View of Woolly Goodies available on my web site

Quick View of Woolly Goodies available on my web site
Click on photo above to see detail / to purchase